To check if you can server-side render (SSR) your components, evaluate them with the SSR playground, the SSR test runner, and unit tests with Jest. You can also manually verify that SSR was successful for a component.
Debug with the SSR Playground
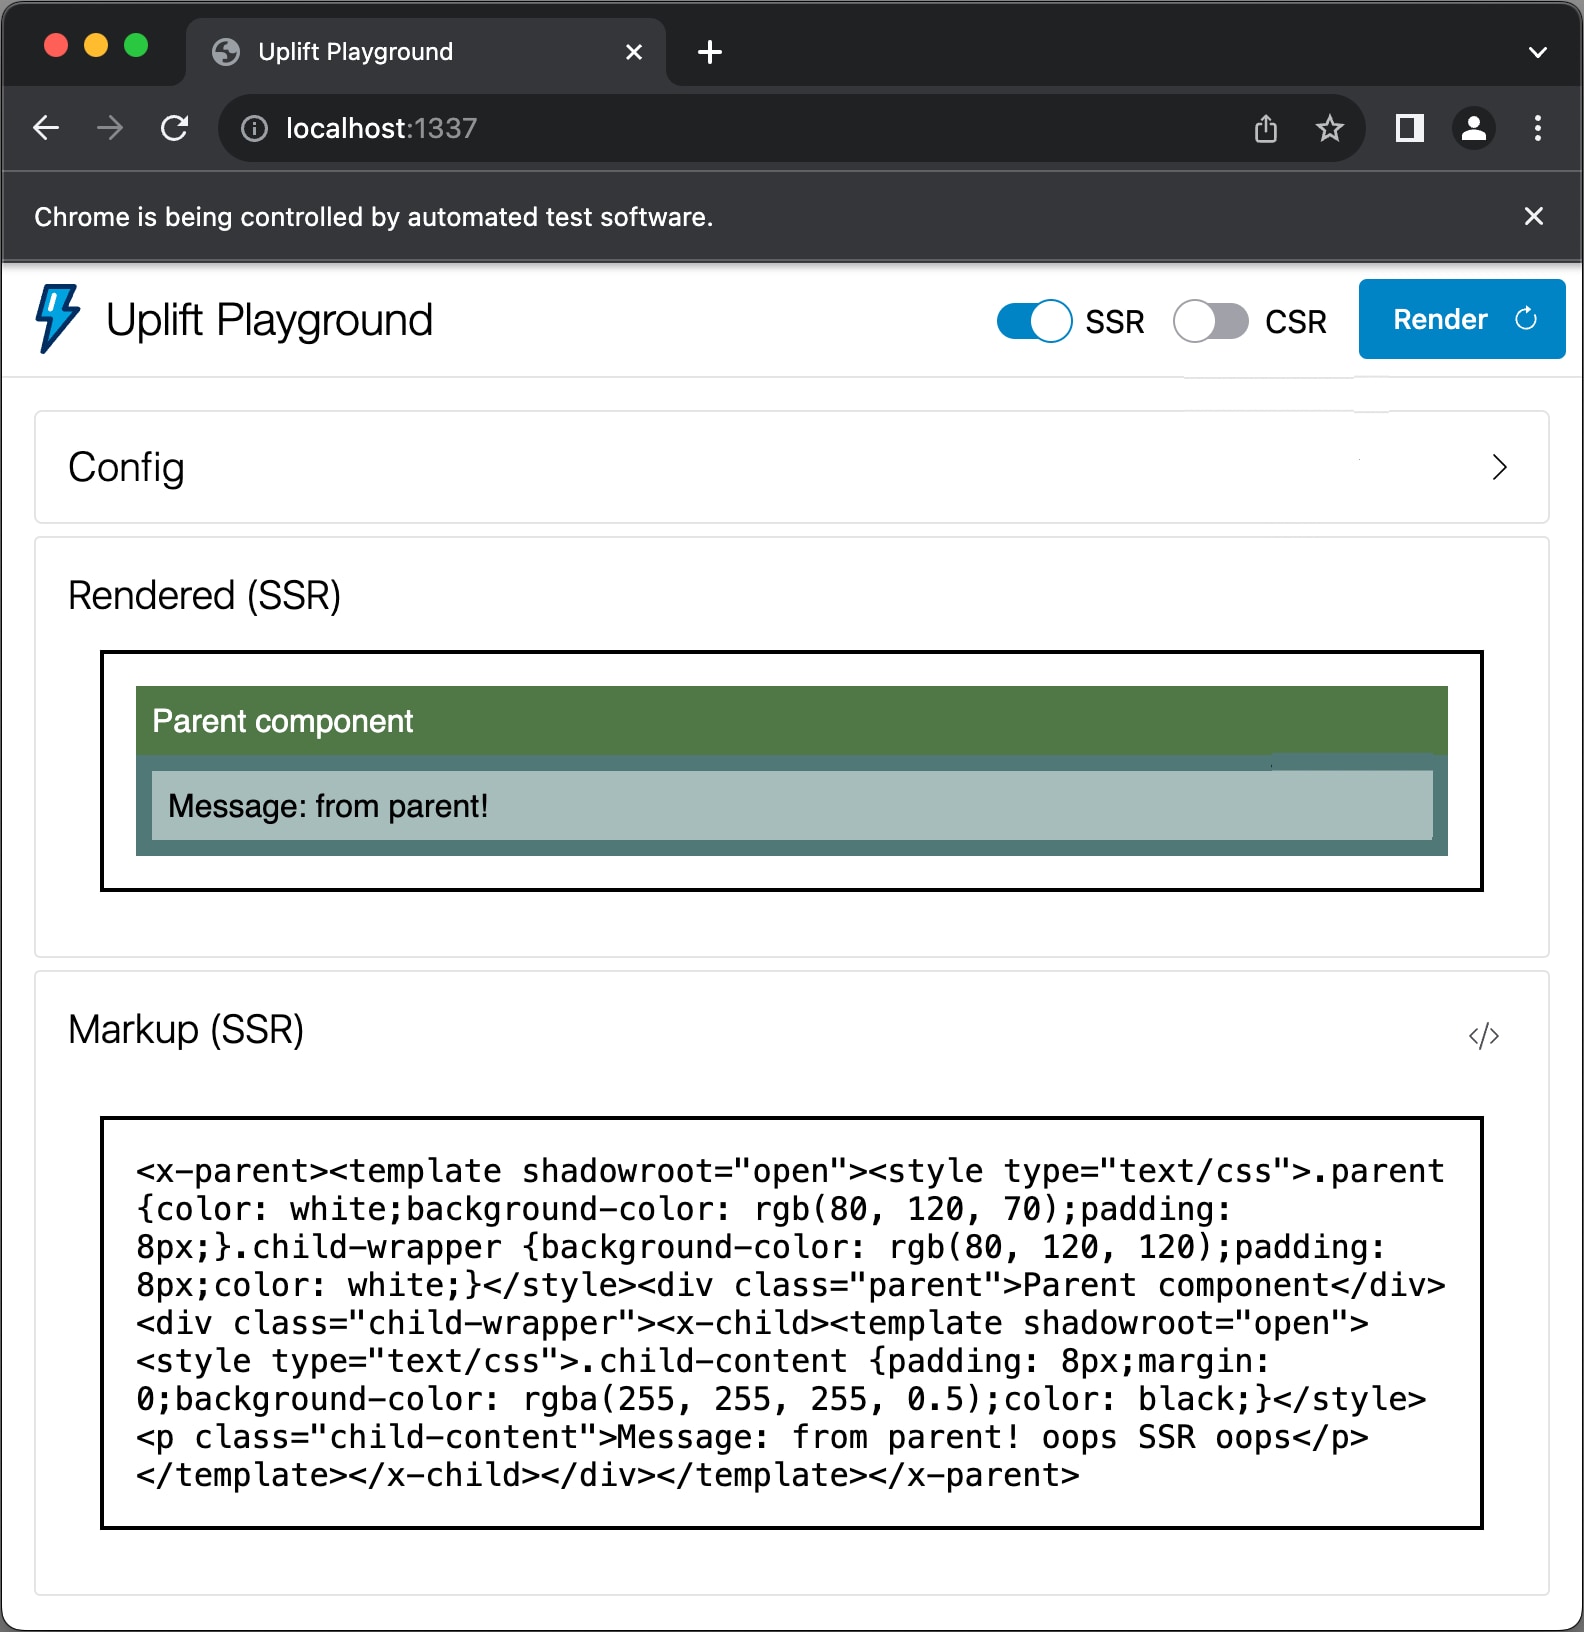
The SSR playground lets you render, debug, and experiment with individual components and their children. You can use the playground in client-side rendering (CSR) mode or SSR mode.
To run the playground, navigate to a directory that contains one of these files and run the appropriate playground command.
lwc.config.json file
package.json file containing an lwc field
sfdx-project.json file that points to a project directory containing LWCs
SSR Playground Commands
To open the playground in Chrome, run this command in your terminal:
Start at the “leaves” of your component tree, or components that don’t contain other components.
Open the component in the SSR playground.
Modify the component properties to test important use cases.
Address errors that are reported during the three phases of hydration—SSR, DOM insertion, and rehydration.
Look for and address any visual bugs in your component.
Enable the CSR toggle to render your component with SSR and CSR side by side.
Use the playground’s comparison tool to ensure the SSR and CSR component instances are visually identical.
Enable the layout shift tool in the Misc section in config to observe any layout shifts during SSR hydration.
By default, the SSR playground takes your component through three stages of its SSR lifecycle:
Render the component to HTML markup on the server.
Insert the markup into the DOM on the client.
Hydrate the DOM subtree and associate it with an instance of your component class.
We recommend that you write tests using the SSR test runner to ensure that your components don’t regress as you make changes.
Install the SSR Test Runner
This tool works best with Node v18 or v20.
Note
You have to install the SSR Test Runner before you can use it on your project.
To add the test runner to your project, download the @lwc/test-runner package using a package management tool. We recommend using Node Package Manager (npm).
Installation command
1npm install --save-dev @lwc/test-runner
Write SSR tests
By default, the SSR Test Runner executes SSR tests in headless Chrome. Unlike Jest tests, the SSR tests run in a full-featured web browser.
Note
To create your own SSR tests, you can use these functions from the @lwc/test-runner package.
renderToMarkup()
renderToMarkup() is an asynchronous function that takes:
The path to your component
The properties that you use for rendering
It returns:
Promise<String> where the String is HTML markup
insertMarkupIntoDom()
insertMarkupIntoDom() is an asynchronous function that takes:
SSR markup, like Promise<String> returned by renderToMarkup()
It returns:
Promise<HtmlElement>(), which is a handle to the root element of your SSR-rendered DOM subtree.
hydrateElement()
hydrateElement() is an async function that takes:
A root element, like Promise<HtmlElement> returned from insertMarkupIntoDom()
Component properties, which should be the same as those passed into renderToMarkup()
It returns:
Promise<Boolean>, where the Boolean indicates whether hydration completed without validation errors. In most cases, you’ll want this Boolean value to be true. If hydration failed, review the errors in the console.
expect()
You can use this function to chain assertions. To make it easier to test your components, it includes all the assertions from Chai.expect as well as the following additions.
throwErrorInConnectedCallback: Asserts any errors thrown in connectedCallback.
SSRCorrectly: Checks that all three stages of SSR lifecycle are performed correctly.
visuallyIdenticalInCSRandSSR: Performs a pixel match of SSR and CSR components.
noLayoutShifts: Ensures that the component didn’t have any layout shifts when it was hydrated in DOM.
notMakeDomMutationsDuringSSR: Ensures that the component didn’t make any DOM mutation.
Example SSR Test
Here’s a sample SSR test that you can execute with the SSR Test Runner.
1import{2 // Importing `expect` from the toolkit is subject to change3 expect,4 querySelectorDeep,5 // These three functions contribute heavily to your tests6 renderToMarkup,7 insertMarkupIntoDom,8 hydrateElement,9}from '@lwc/test-runner';1011// Instead of importing the component directly, use the path of12// the component's JS file. This value is passed to `renderToMarkup`13// and `hydrateElement` where the component is imported automatically.14const componentPath = import.meta.resolve('./parent.js');1516describe('<x-parent>', ()=>{17 it('is SSR-able and very snazzy', async()=>{18 // Errors thrown during SSR cause the test to fail19 const markup = await renderToMarkup(componentPath, {});2021 // Once you have the raw HTML markup, you can make related assertions.22 expect(markup).to.contain('</x-parent>');2324 // Insert that markup into the DOM. It doesn't get attached25 // to an instance of your component class yet.26 const el = await insertMarkupIntoDom(markup);2728 // Make assertions about pre-hydrated DOM29 expect(el).to.haveShadowChild('p.child-content');3031 // Finally, hydrate the HTML that was generated on the server and32 // inserted into the DOM in previous steps.33 const hydratedWithSsrDOM = await hydrateElement(el, componentPath);3435 // Check that hydration occurred without validation errors.36 expect(hydratedWithSsrDOM).to.be.true;3738 // Now that the SSR-generated markup has been inserted and hydrated,39 // the component should behave as though it were originally rendered40 // in the browser with CSR. Check the component to ensure expected behavior.41 expect(querySelectorDeep('p.child-content', el)).to.have.text('Hmm! hello from parent');42});4344 // Unless you want to make assertions on output of each individual stage of SSR,45 // you can use this one-liner to check that DOM was hydrated without any errors.46 it('SSR correctly', async()=>{47 await expect(componentPath, {}).to.SSRCorrectly();48});4950 // Make sure no error is thrown when connected callback lifecycle is executed51 it('doesnt throw in connected callback', async()=>{52 await expect(async()=>{53 await renderToMarkup(componentPath, {});54}).to.not.throwErrorInConnectedCallback();55});5657 // Pixel match rendered SSR and CSR components to check for visual correctness58 it('checks that SSR and CSR are visually the same ', async()=>{59 await expect(componentPath, {}).to.be.visuallyIdenticalInCSRandSSR();60});6162 // No layout shift was observed during hydration stage63 it('has no layout shifts', async()=>{64 await expect(componentPath, {}).to.have.noLayoutShifts();65});6667 // The component doesn't make any DOM mutation68 it('makes no DOM mutations', async()=>{69 await expect(componentPath, {}).to.notMakeDomMutationsDuringSSR();70});71});
Run the Test Runner
Ready to invoke the test runner and run your own SSR tests? First, make sure you installed the @lwc/test-runner dependency for your project.
Then, run the test runner using npx or NPM scripts to invoke the @lwc/test-runner command. Tests run in parallel in separate headless Chrome tabs. The tests run fast, and as many as ten thousand tests can complete in under six seconds — depending on your hardware.
Here’s the npx command to start the test runner. To customize your test runner output, you can use supported command line flags. By default, the @lwc/test-runner command prints all the browser console output in your terminal.
1npx @lwc/test-runner SPEC_FILE_PATTERN
If you use ZSH, surround SPEC_FILE_PATTERN in single quotes.
Important
To distinguish your project’s SSR tests from your Jest tests, use unique file extensions. For example, if your Jest tests follow the format COMPONENT_NAME.spec.js, you can follow the format COMPONENT_NAME.spec-ssr.js for your SSR test files. If you follow this filename format, run your tests like this:
1npx @lwc/test-runner './src/**/*.spec-ssr.js'
You can also create a shortcut for this command in your project’s package.json that uses NPM. Here’s an example:
Add these flags to your @lwc/test-runner command to customize its command line output.
Flag
Description
--debug
Enables debug mode to find issues with your tests.
--modulesDir <directory name>
Invoke the test runner on a specific directory in your project.
--puppeteer
Execute the test runner in the Puppeteer browser environment.
--quiet
Prevents browser console output from printing in your terminal.
Interpret Test Runner Output
If the test runner returns failures for hydrateElement, noLayoutShifts, or notMakeDomMutationsDuringSSR, you likely have performance issues on the client-side.
Manually Verify SSR for a Component
When a component is rendered on a page, you can verify that SSR was successful by looking at the DOM elements.
To determine if an island or component tree implemented SSR successfully:
In Chrome, right-click the page and select to View Page Source. If you use Firefox or another browser, the View Page Source tool might be named something else, like Inspect or View Selection Source.
Search for some HTML or text from the component. If you find it, then SSR was successful.
Jest is the primary tool used for testing in LWR projects. The lwc-test NPM package lets you write Jest unit tests that you can run in SSR and CSR environments. We recommend using two separate test suites to ensure that SSR and CSR are independently and thoroughly validated.
To start working with SSR or CSR unit tests, add the latest version of the following dependencies to your project:
@lwc/jest-ssr-snapshot-utils
@lwc/jest-jsdom-test-env
@lwc/jest-preset
SSR Unit Tests
Server-side tests focus on rendering components to static HTML on the server side. To make sure that server-side logic works as expected without client-side DOM interactions, these tests are executed in a Node environment.
Here’s a sample Jest configuration file for server-side testing:
To run a server-side test, add a script to your package.json. You can alternatively use jest --selectProjects <project_name> to target specific test suites.
Running server-side tests generates static HTML markup as snapshots. Every part of a snapshot associated with a table-driven test case is linked to a unique hash that’s generated from the component’s tag name, properties, and state. Use snapshots to verify the consistency of server-rendered output, like this:
Run server-side tests to generate baseline snapshots.
Whenever your components change, rerun the server-side tests to identify any related markup changes. The tests fail if any discrepancies between component versions arise.
After you confirm that your changes are safe and valid, update your HTML markup snapshots.
CSR Unit Tests
Client-side tests validate how components behave post-hydration in a browser-like environment. To simulate browser behavior, these tests are executed using JSDOM.
Here’s a sample Jest configuration file for client-side testing:
To track hydration errors, monitor the console.warn event.
jest.ssr-client.setupAfterEnv.js
1let hydrationMismatchOccurred = false;2let hydrationMismatchMessage = '';34beforeEach(()=>{5 // Reset the flag and message before each test6 hydrationMismatchOccurred = false;7 hydrationMismatchMessage = '';89 // Spy on console.warn and intercept warnings10 jest.spyOn(console, 'warn').mockImplementation((message)=>{11 if(message.includes('Hydration mismatch')){12 // Set the flag to indicate a hydration mismatch occurred13 hydrationMismatchOccurred = true;14 // Store the hydration mismatch message15 hydrationMismatchMessage = message;16}else{17 // If it's not a hydration mismatch, call the original console.warn18 console.warn(message);19}20});21});2223afterEach(()=>{24 // Restore original console.warn after each test25 jest.restoreAllMocks();2627 // Check if a hydration mismatch occurred and fail the test if so28 if(hydrationMismatchOccurred){29 throw new Error(`Test failed due to hydration mismatch: ${hydrationMismatchMessage}`);30}31});
To run a client-side test, add a script to your package.json. You can alternatively use jest --selectProjects <project_name> to target specific test suites.
Client-side tests use server-side snapshots to validate your components’ post-hydration behavior, like this:
Read server-side-generated snapshots.
Insert the pre-rendered markup into the DOM.
Hydrate the component and validate its behavior in the client environment.
By comparing pre- and post-hydration markup, SSR client-rendering testing helps identify potential performance issues early on. It helps you address inconsistencies, layout shifts and inefficiencies before they affect your overall user experience.
Enabling SSR for an entire page is a prerequisite for configuring a single component island for SSR.
Developer Preview Feature
Feature is available as a developer preview. Feature is not generally available unless or until Salesforce announces its general availability in documentation or in press releases or public statements. All commands, parameters, and other features are subject to change or deprecation at any time, with or without notice. Do not implement functionality developed with these commands or tools.


 j
j