


Setting Up OAuth with Point of Sale APIs
Point of Sale supports OAuth for secure authentication with APIs and SPIs. Configure the OAUTH-OAuth SPI by entering the required URL, client secret, and headers. This setup allows the system to obtain an authentication token before making any other SPI calls.
CMS Configuration and Setup
To configure OAuth authentication for Point of Sale APIs, set up the OAUTH-OAuth SPI connector in CMS and then configure your individual SPIs to use the generated authentication tokens. The process involves two main steps: first establishing the OAuth connection, then applying it to your specific API integrations.
Configuring OAUTH-OAuth SPI
- In CMS, go to Integrations > Custom Connectors.
- Click Create.
- For Connector Type, select SPI.
- For Endpoint Name, select OAUTH-OAuth.
- Update the API Endpoint to add
grant_type=client_credentials. For example,https://interdev.my.sf.com/services/oauth2/token?grant_type=client_credentials. - Set the Integration Type to
HTTP_POST. - Specify the authorization key using the JSON Headers.
- Retrieve the Client ID and Client Secret from the external API.
- Generate a Base64 concatenated Client ID and Client Secret, with a colon (:) and a single space.
- Add this string to the JSON Headers.
1{
2  "Content-Type": "application/x-www-form-urlencoded",
3  "Authorization": "Basic M01WRzlGSU5PMW5zeFJ1QVRUODVIOEVzMVZ5eUhWemNFd1BmQ0dkZnNSQlhVQUJlSjJ2YXFDSE00cG9vd2k2c2tZQnZiN2xqLkl0ZnQ0ZTVacXNQbTogQjg1MjFBNEFFMjZBMzJERDQwOTZDMzlCODJCN0UyQjhEQjRBNUIxMjU3MUEwQUYwQjlBREM3Qjg5OTEyQTBEQQ=="
4}- Include a space after the word
Basic(don’t include a colon). - Generate the basic token by concatenating the Client ID and Client Secret with a colon and space. For example,
client_id: client_secret.
Note
Example SPI Response
1{
2  "token_type": "Bearer",
3  "expires_in": 3600, //Optional field - Number of seconds this key will be present in cache for subsequent SPI calls
4  "access_token": "*****" // Token sent as part of the header in other SPI requests.
5}
Configuring SPIs with OAuth
- In CMS, go to Integrations > Custom Connectors.
- Click Create in the upper right.
- For Connector Type, select SPI.
- For Endpoint Name, select an SPI. For example, SHIPPING_METHOD.
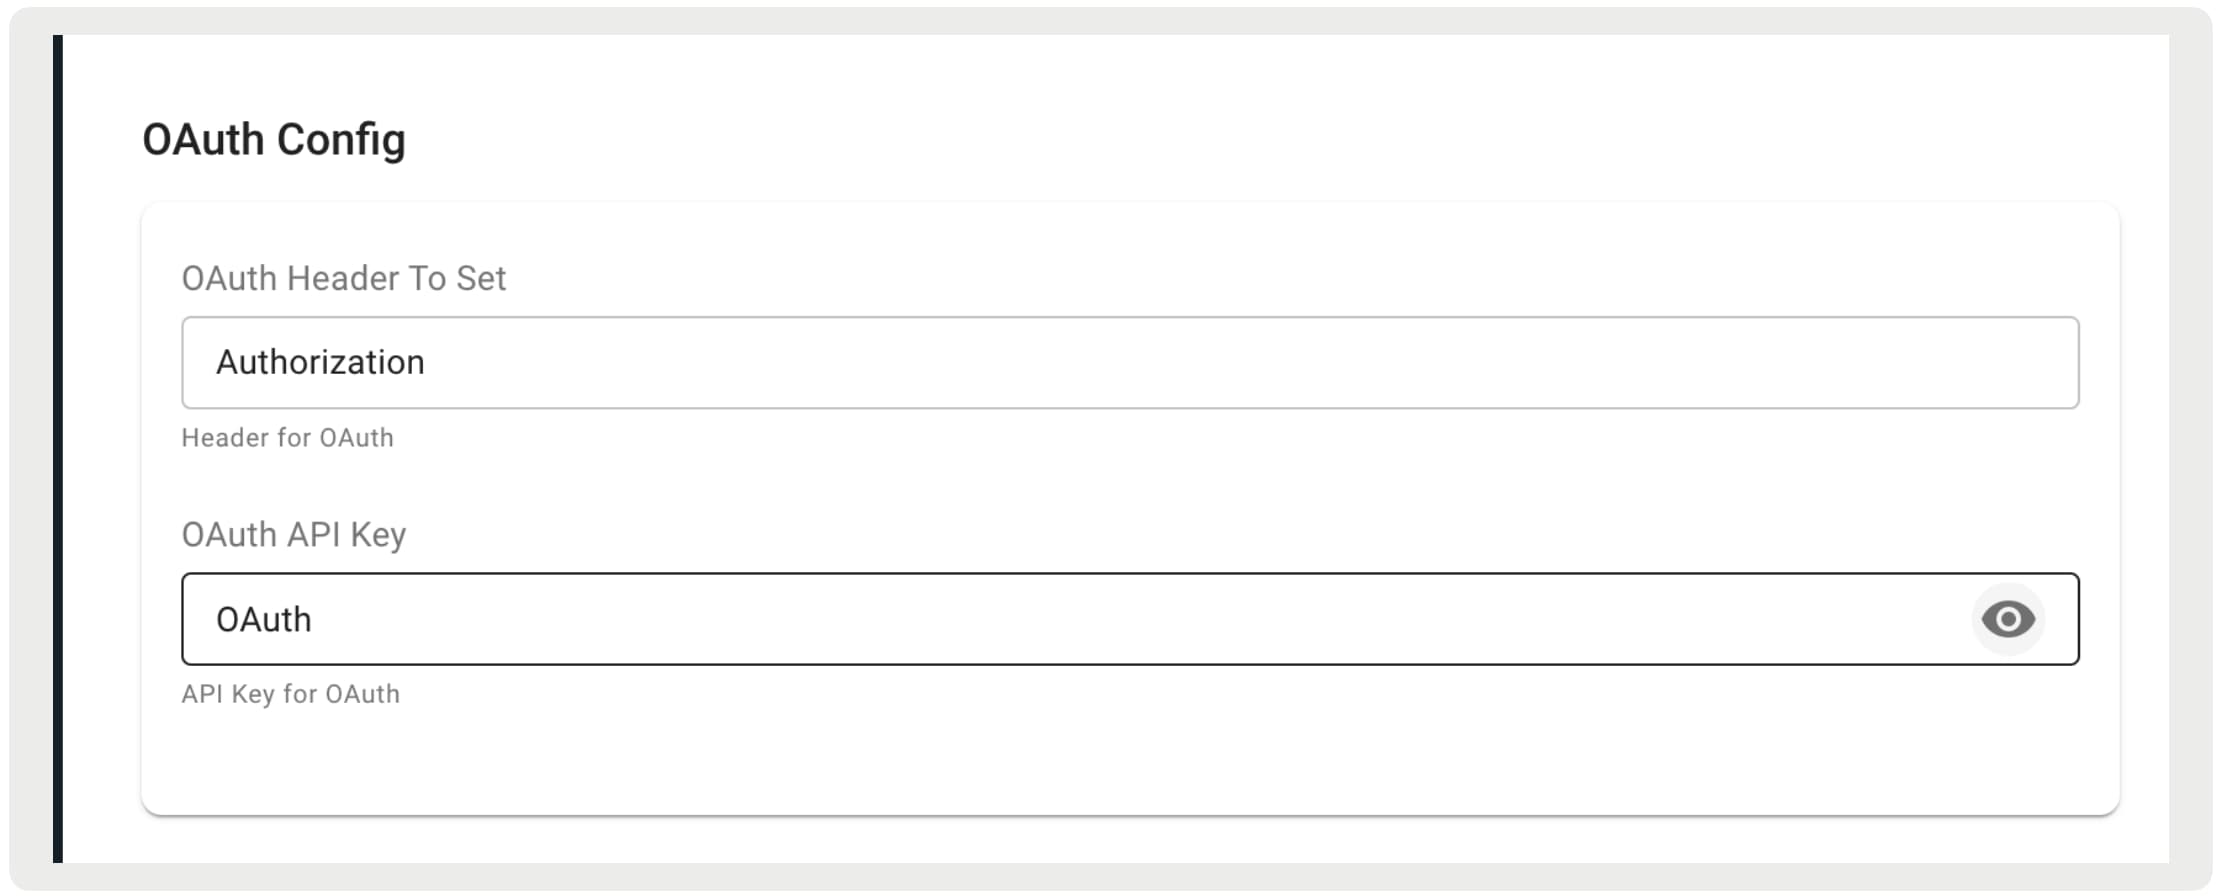
- Navigate to the OAuth Config settings.
- Set the OAuth Header to the header of your choice.
- Set the OAuth API Key to either
OAuthorOAUTH. - Configure the rest of the required fields.
- Save your changes.
Example SPI Request with Headers
1{
2 "httpHeaders": {
3 "Authorization": "Bearer *****",
4 "Content-Type": "application/json"
5 }
6} j
j