Deliver content to your site visitors in the languages that they prefer, and reach new audiences in new languages. You can translate your LWR site into languages that Salesforce supports and offer your site in up to 40 languages.
On standard components that come with an LWR template, you can translate text values in component properties such as text, URLs, and alt text fields. You can also translate text contained in components such as Rich Content Editor, HTML Editor, and Text Block. And you can translate SEO page properties, including title, description, and head tags.
For custom Lightning web components that you include in your site, you can make a String property translatable by defining it as translatable="true" in the component’s js-meta.xml file. For example:
You can translate the content in these text fields directly in the component property editors in Experience Builder. Or, you can export your site content for translation, and the properties that you marked as translatable are included in the export file.
If you add a datasource attribute to a property—for example, to create a picklist—you can’t define that property as translatable="true".
Note
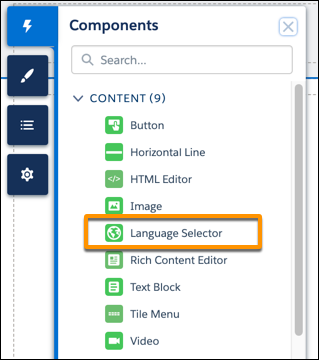
Add the standard Language Selector component to your site so your visitors can select which language to view on your site.
When your site visitors select a language, the URL for your site updates to indicate which language they’re viewing. For example, if your site URL is https://www.UniversalTelco.my.site.com and you add a French translation to your site, the URL for the translated version is https://www.UniversalTelco.my.site.com/fr.
If you prefer to use different logic to identify languages in your site URL, or you want a different language-selector design, create your own Lightning web component.
Note
Limitations to Multilingual LWR Sites
There are some limitations to keep in mind.
Some Lightning base components don’t support localization and aren’t compatible with multilingual sites.
You can’t use the Google Cloud Translation API with LWR sites.
LWR sites offer limited support for right-to-left languages in standard components. For the best customer experience in these languages, use custom Lightning web components.
In enhanced LWR sites, the available languages are limited to the languages that are enabled in your Salesforce org. If a language that’s on your Site Languages list is later disabled in Salesforce, the site translation in that language is still visible to your users. You can still update that site translation, but you can’t select a disabled language as your default site language.
In rare cases, the URL for a translation of your site inadvertently conflicts with other site URLs. For example, the URL for a translation can end up identical to the URL for a particular page on your original site. Or, it can end up identical to the URL for the home page on another one of your sites. In the first case, the URL that leads to the translated site takes precedence over the URL that leads to the page on your original site. In the second case, the URL that leads to your other site takes precedence over the URLs that lead to your translation or to a specific page.
To see how your site visitors can experience this URL conflict, let’s look at some sample URLs.
Say you have a site at https://UniversalTelco.my.site.com, and you have a page on the site for your franchisees at https://UniversalTelco.my.site.com/fr. The main URL for your site ends with .com, and the URL that leads to the franchisees page ends with /fr.
Then you translate your site into French. When you publish the French translation, the main URL for your site is followed by the part of the URL that identifies the language, /fr. So the URL for the French translation of your site is also https://www.UniversalTelco.my.site.com/fr. When users enter this URL in a browser, they land on the home page of your French translation, not on the franchisees page.
Now let’s say you set up a new site at https://UniversalTelco.my.site.com/fr for a sale that you’re running in the city of Framingham. Again, the main URL for your site ends with .com, and the URL for your sale site ends with /fr. In this case, when users enter https://UniversalTelco.my.site.com/fr into a browser, they land on the page for your sale site, not on your French translation or the franchisees page.
To avoid these URL conflicts, change the URL for the franchisees page to end with something different, such as /franchisees. And change the URL for the sale page to end with something different, such as /framingham.
To offer your site in multiple languages, first add each language to the site from the Settings panel in Experience Builder. You can offer your site in up to 40 languages, including your default site language. Each language that you add appears in the language selector in Experience Builder for easy navigation between different translations of your site. To make the translations available to your site visitors, add the Language Selector component to your site.
When you create an LWR site, the default site language is English (US). If you want to change it to a different default language, update the default language as soon as possible after you create the site to avoid losing content.
When your customers access an LWR site, they see the site in the localized language that’s set in their browser settings. Automatic language detection works when you republish your LWR site and the site has a localized version.
After you add a language to your site, you can enter translations for that language directly into the component property editor panels in Experience Builder. Alternatively, to upload an entire site translation at once, export the site content for translation, then import the translated content in an .xlf file.


 j
j