Define a Custom Split Activity with Multiple Outcomes

You can provide multiple possible outcomes for your custom split activities in Journey Builder. First, define default outcomes in the activity’s config.json. The activity’s custom javascript then overrides these default outcomes programmatically, or based on user-supplied values.

Use the RestDecision activity type when configuring multiple outcomes.

Note

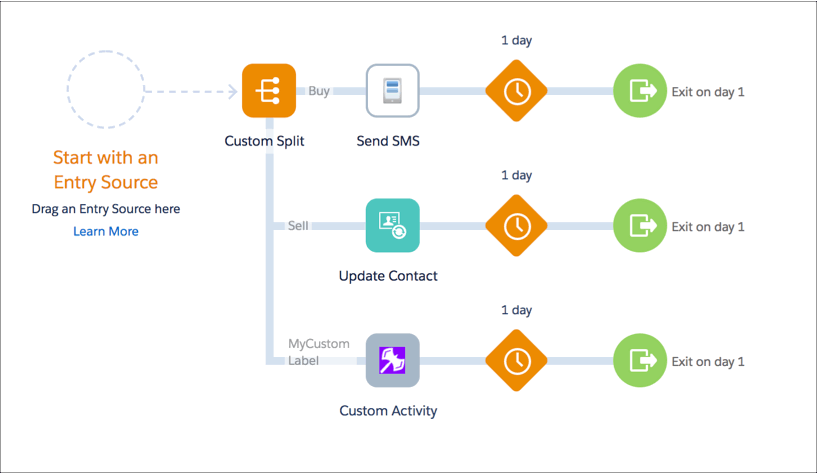
Decision tree of outcomes for Buy, Sell, and Custom Label, respectively: Send SMS, Update Contact, or Custom Activity, each with 1 day turnaround.

Define Default Outcomes 

To define default outcomes, include an outcomes object in the activity’s config.json.

  • Each default outcome must contain an arguments object that contains a branchResult field. Journey Builder expects the custom activity’s Execute REST call response to contain the { branchResult: value } object. The value matches the branchResult of one of the activity’s outcomes.

  • Give the custom activity a label in the UI. Include a label field in the outcome’s metaData object. Journey Builder displays the text in this field when users hover over the branch entry point.

If you don’t define a label, it is loaded using the internationalization (i18n) strings from the config.json.

Note

Sample 

1"outcomes": [
2    {
3        "arguments": {
4            "branchResult": "buy_item",
5            "some argument": "passed from config.json for buy_item"
6        }
7    },
8    {
9        "arguments": {
10            "branchResult": "sell_item",
11            "some argument": "passed from config.json for sell_item"
12        }
13    },
14    {
15        "arguments": {
16            "branchResult": "hold_item",
17            "some argument": "passed from config.json for hold_item"
18        },
19        "metaData": {
20            "label": "MyCustomLabel"
21        }
22    }
23]

Related Items