Managed Runtime makes it easy to manage your organizations, projects, environments, and bundles associated with your PWA Kit storefront. This guide describes the growing list of administration tasks that are possible in the web-based Runtime Admin tool. All of the administration tasks described in this guide, and many more, can also be done using the Managed Runtime API.
Before you continue, make sure that you have access to Managed Runtime and Runtime Admin. To provision Managed Runtime, contact your Success Manager. For Runtime Admin, contact your B2C Commerce administrator and ask them to add either one of the following roles to your account using Account Manager: Managed Runtime User or Managed Runtime Admin.
Important
Organization
Organization-level administration allows you to manage users and certificates across all projects within your organization. These tasks are typically performed by organization admins or users with specific organizational permissions.
Managing Organization Users
Organization admins can manage user access and permissions at the organization level, which affects user access across all projects within the organization.
Users must have the Project Admin or Project Developer role and the organization View or Manage certificate permission to change certificates.
Certificates can only be used with environments in the same organization.
Changes to certificate associations require environment redeployment.
Important
Certificate Troubleshooting
If you encounter issues with certificates:
Domain Validation Fails: Verify CNAME records are correctly configured and propagated with the validation window.
Projects
Projects help you manage multiple environments within an organization. Every PWA Kit project needs a corresponding project within Managed Runtime for deploying and hosting the storefront code on Salesforce’s public cloud infrastructure.
While this guide describes how to manage projects using the web-based Runtime Admin tool, you can use the B2C Commerce CLI to manage Managed Runtime (MRT) projects, environments, and deployments directly from your terminal. First, see B2C CLI, MCP and Tooling SDK to install the tool and authenticate.
Once configured, use the CLI to streamline MRT administration, for example:
1# List all Managed Runtime projects2b2c mrt project list34# Deploy a specific bundle to an environment5b2c mrt bundle deploy<bundle-id>--project<project-id>--environment<env-id>67# Manage environments and environment variables8b2c mrt env list --project<project-id>9b2c mrt env var --project<project-id>--environment<env-id>1011# Manage URL redirects for an environment12b2c mrt env redirect --project<project-id>--environment<env-id>
For a complete list of Managed Runtime CLI commands, see MRT Commands.
Under Add New Project Details, enter a name for the project.
Under Set Environment Defaults, review the default settings that apply to new environments in the project. Server-Side Cookie Access is enabled by default for new projects, which lets your storefront access and manage cookies from server-side code. To turn it off, clear the setting.
Click Create Project.
When you first create a project, your site isn’t accessible on the web until after the necessary cloud infrastructure is deployed. This deployment process can take up to 40 minutes.
Note
Find a Project in Runtime Admin
The instructions for the rest of the administration tasks in this guide all assume that you’re starting from a project Overview page in Runtime Admin.
To find an existing project and open its Overview page:
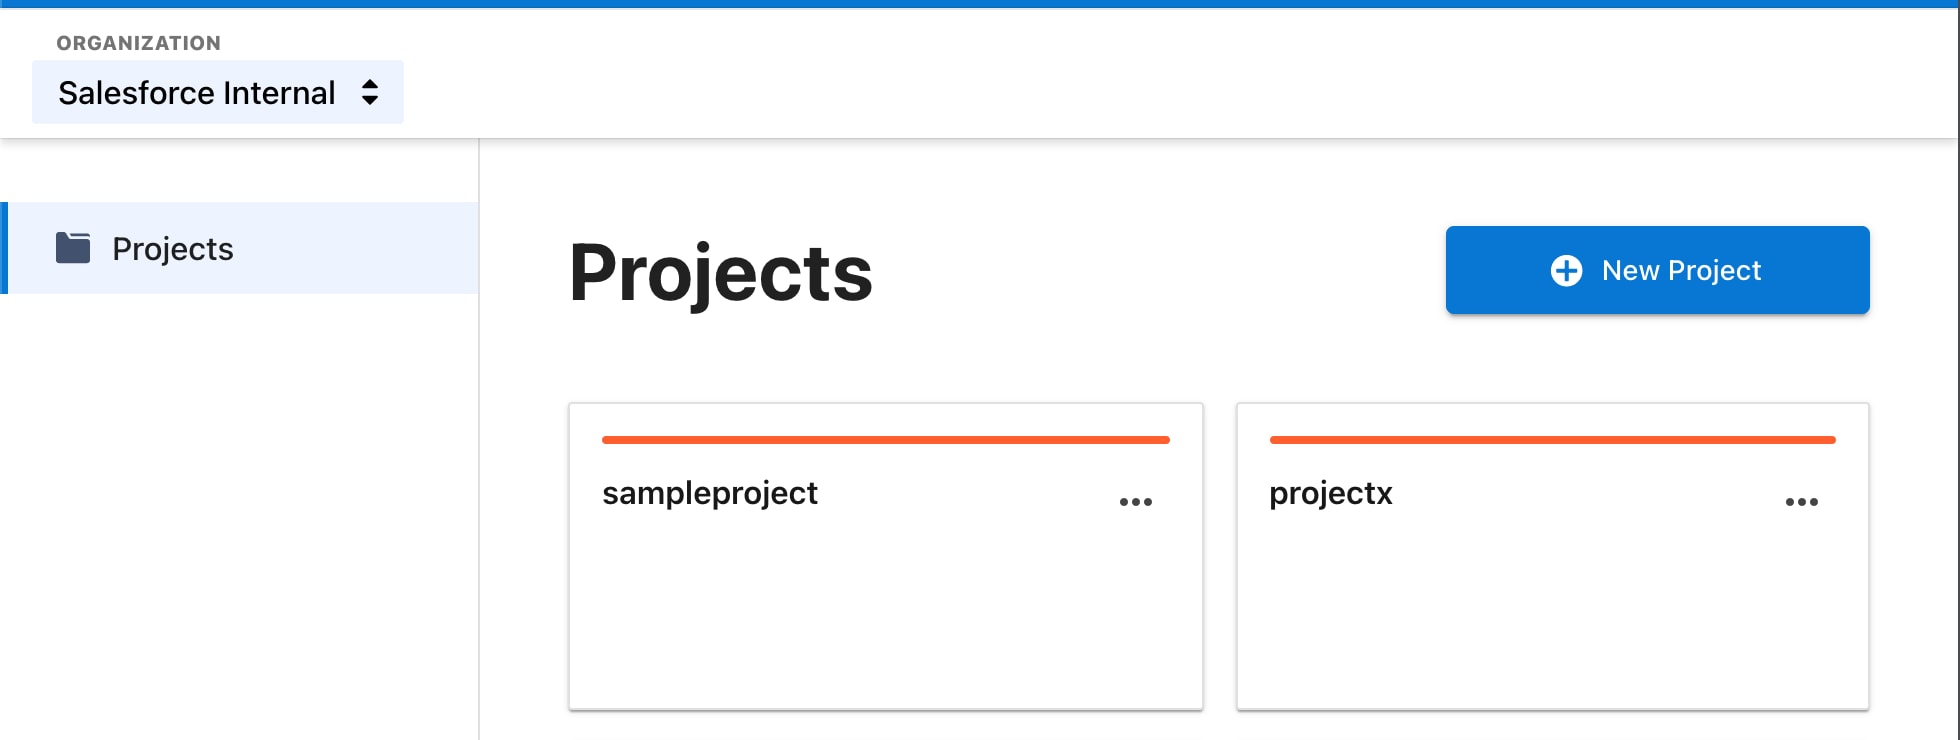
Select an organization from the organization menu (top left), if necessary.
Click the name of the project. (To see the project, you must be assigned one of the project roles described previously.)
To find a project quickly, use the project search box to filter across all the projects in your organization, not just the ones on the current page. You can also choose how many projects to show per page (20, 50, or 100). Your search term and page size are saved in the page URL, so you can bookmark or share a filtered view.
To quickly switch between projects, use the project menu at the top of the page.
View and Edit Project Settings
The Project Settings page is where you can do the following tasks:
Look up the project ID and ensure that it matches a PWA Kit configuration.
Edit the project ID.
View and edit the project’s name and URL.
Set environment defaults, including the default server architecture and proxy user agent for new environments.
Delete the project.
Manage deployment notifications. (See next section.)
To access the Project Settings page:
Go to a project’s Overview page.
Click Project Settings from the left navigation.
To edit the settings, click Edit, make your edits, and click Update. To discard your edits, click Cancel.
To delete a project, click Delete, enter the project name to confirm, and click Yes, Delete. To keep the project, click No, Keep.
Deployment Notifications
You can choose to be notified by email whenever any of the following deployment events happen:
Start Deployment
Successful Deployment
Failed Deployment
Add a Notification
To add a notification:
Go to a project’s Overview page.
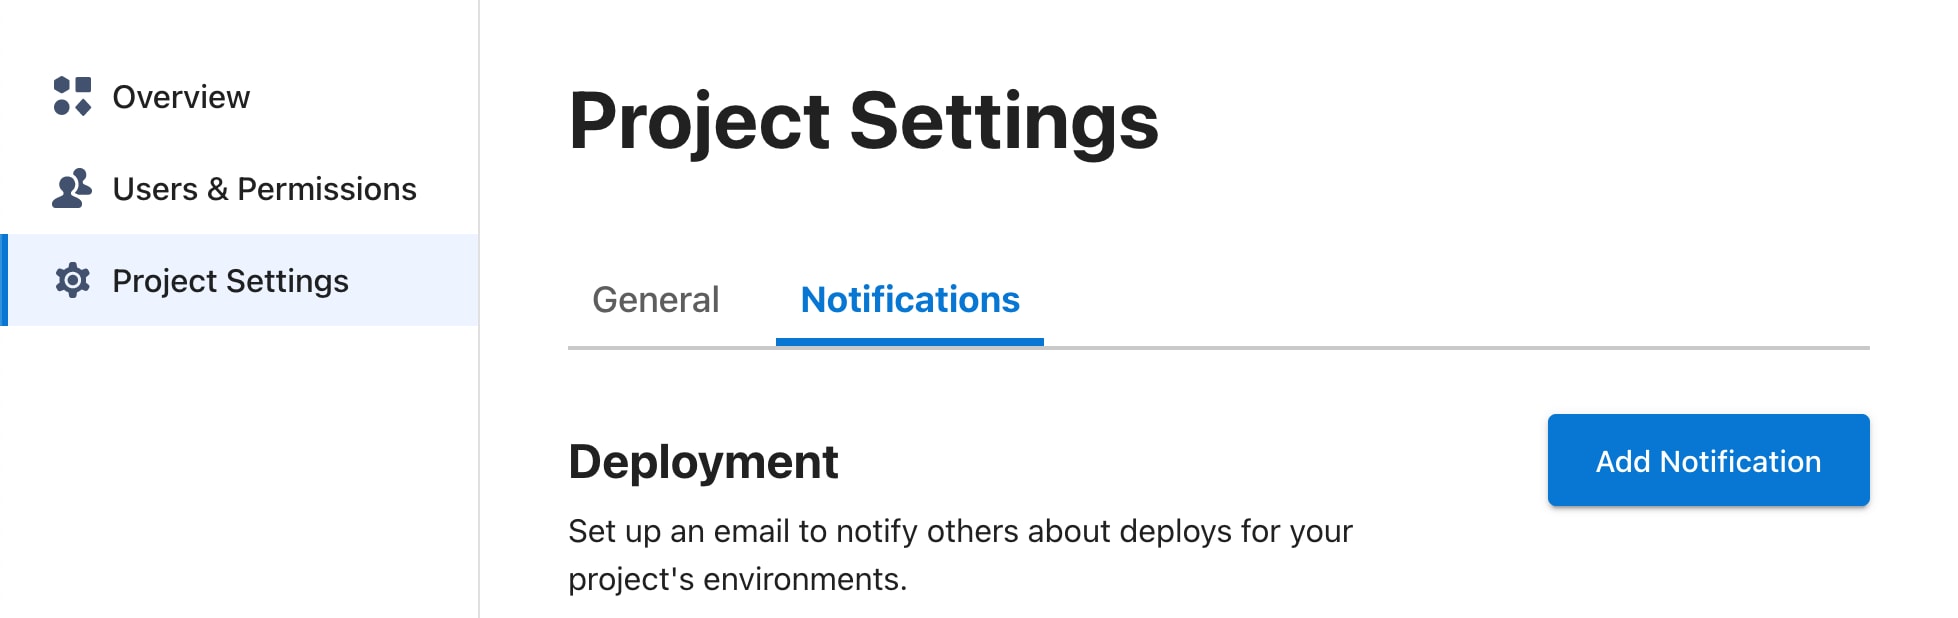
Click Project Settings from the left navigation.
Click Add Notification.
Select one or more environments to be notified about.
Select one or more deployment events.
Enter email addresses for all notification recipients.
Click Add Notification.
Edit a Notification
To edit a notification:
Go to a project’s Overview page.
Click Project Settings from the left navigation.
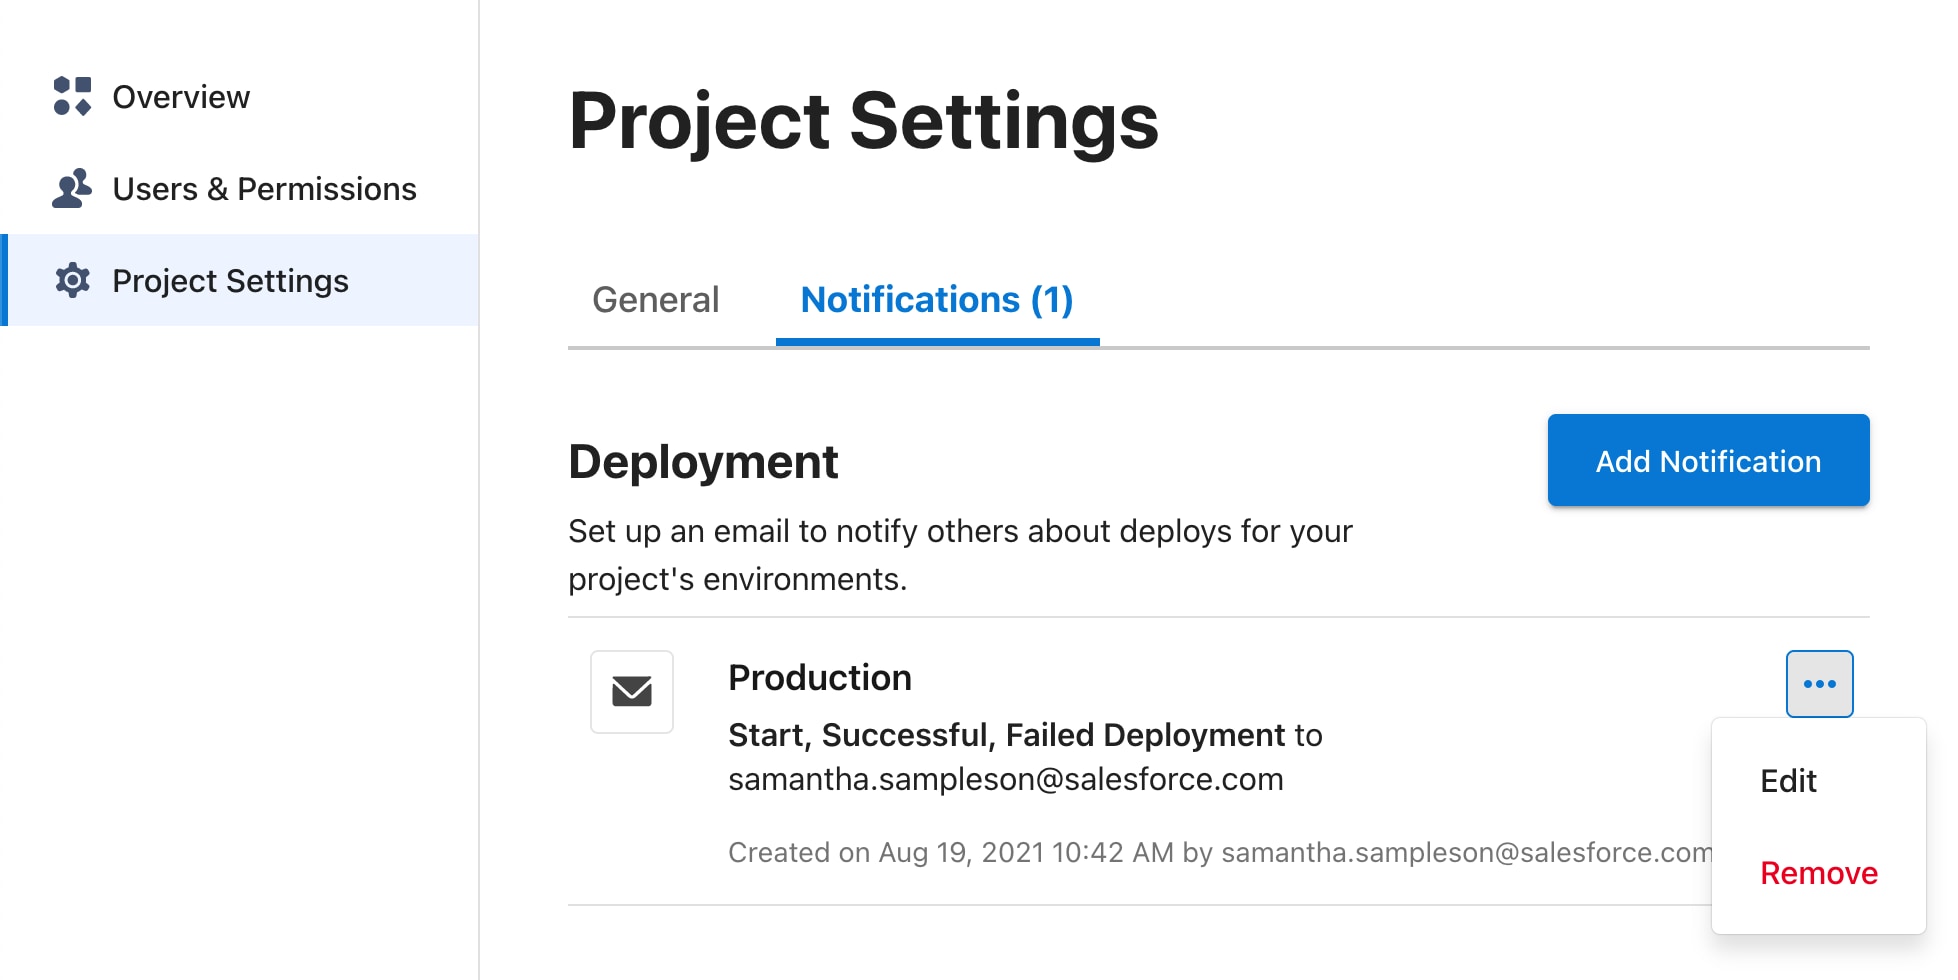
Click the … button next to the notification.
Click Edit.
Change any of the notification settings.
Click Update Notification.
Remove a Notification
To remove a notification:
Go to a project’s Overview page.
Click Project Settings from the left navigation.
Click the … button next to the notification.
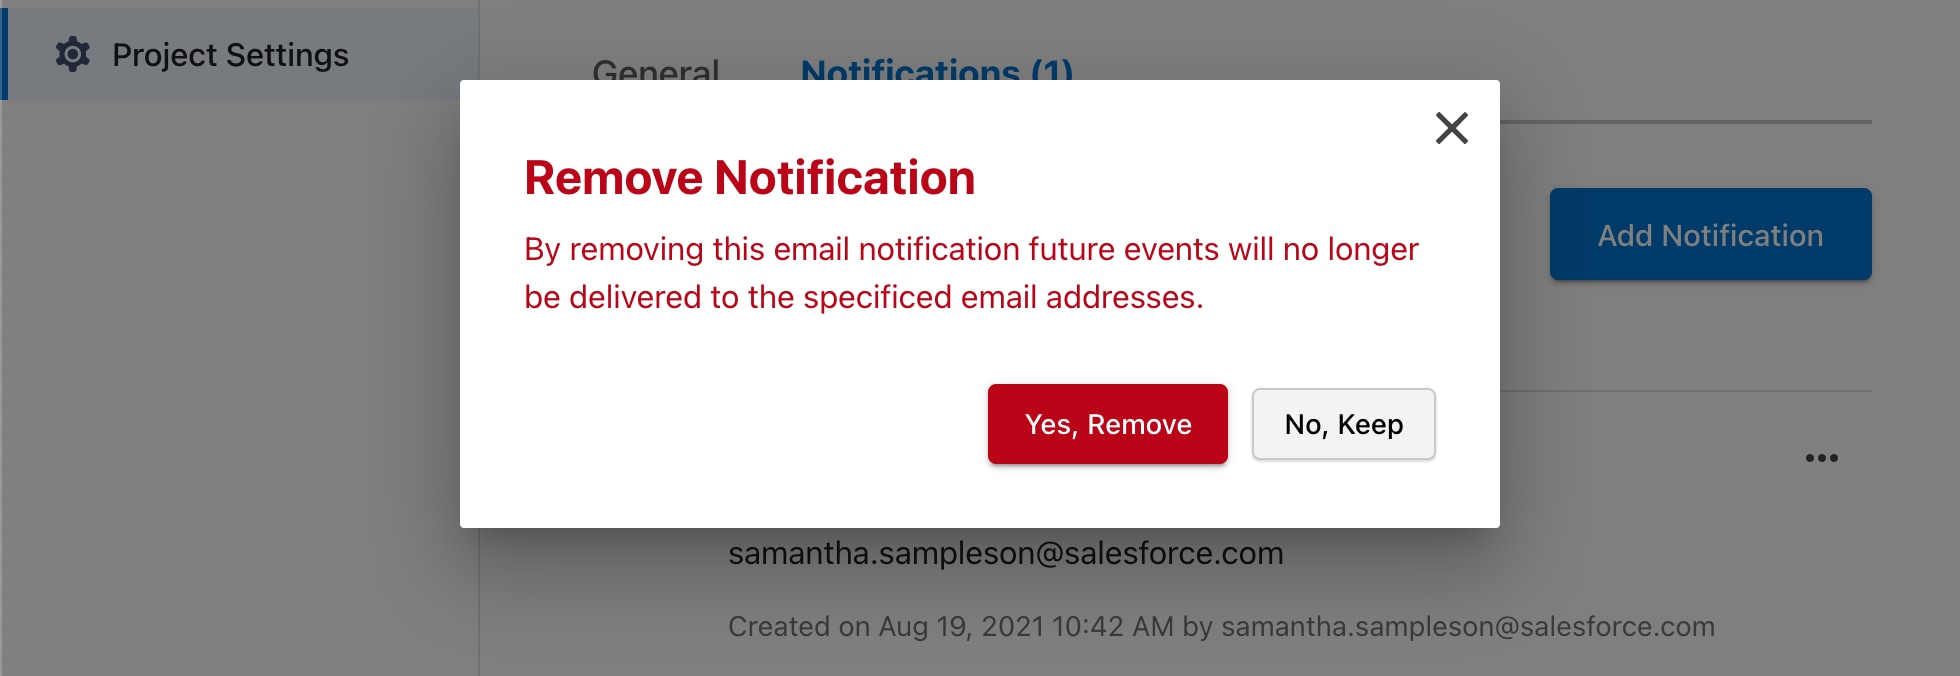
Click Remove.
Click Yes, Remove.
Environments
Environments are used to separate your production storefront from other storefronts that are deployed for other purposes, such as development or testing. To learn more about environments and other related concepts, see the Managed Runtime Overview.
Create an Environment
To create an environment in Runtime Admin:
Go to a project’s Overview page.
Click New Environment
Enter a name for the environment.
Select a region for deploying to Salesforce’s public cloud infrastructure.
If the environment is a production environment:
Mark it as production. If you have reached your limit of production environments, contact Support. For more information, see Production Environments.
Add one or more site IDs to associate with the environment.
Select a B2C Commerce instance to connect to the environment.
Click Complete Setup.
The default region for new environments is US East (N. Virginia) because it’s located closest to on-demand sandboxes, which are commonly associated with development and testing environments.
If you previously created an environment, you can Edit Environment Settings to connect it to a B2C Commerce instance and one or more site IDs.
Non-production environments have lower capacity limits, reflecting their use for development and testing traffic. Production environments also receive additional internal monitoring by Salesforce. For details, see Production Environments.
Note
Supported Regions
All supported regions have a paired backup region for failovers. You’re responsible for ensuring that your application runs correctly in the selected primary and backup regions:
Primary Region
Backup Region
us-east-1 - US East (N. Virginia)
us-east-2 - US East (Ohio)
us-east-2 - US East (Ohio)
us-east-1 - US East (N. Virginia)
us-west-1 - US West (N. California)
us-west-2 - US West (Oregon)
us-west-2 - US West (Oregon)
us-west-1 - US West (N. California)
ca-central-1 - Canada (Central)
us-east-2 - US East (Ohio)
sa-east-1 - South America (São Paulo)
us-east-1 - US East (Northern Virginia)
ap-south-1 - Asia Pacific (Mumbai)
ap-south-2 - Asia Pacific (Hyderabad)
ap-south-2 - Asia Pacific (Hyderabad)
ap-south-1 - Asia Pacific (Mumbai)
ap-southeast-1 - Asia Pacific (Singapore)
ap-northeast-2 - Asia Pacific (Seoul)
ap-southeast-2 - Asia Pacific (Sydney)
ap-southeast-1 - Asia Pacific (Singapore)
ap-southeast-3 - Asia Pacific (Jakarta)
ap-southeast-1 - Asia Pacific (Singapore)
ap-northeast-2 - Asia Pacific (Seoul)
ap-southeast-1 - Asia Pacific (Singapore)
ap-northeast-1 - Asia Pacific (Tokyo)
ap-northeast-3 - Asia Pacific (Osaka)
ap-northeast-3 - Asia Pacific (Osaka)
ap-northeast-1 - Asia Pacific (Tokyo)
eu-west-1 - EU (Ireland)
eu-west-3 - EU (Paris)
eu-west-2 - EU (London)
eu-west-1 - EU (Ireland)
eu-west-3 - EU (Paris)
eu-central-1 - EU (Frankfurt)
eu-central-1 - EU (Frankfurt)
eu-west-3 - EU (Paris)
eu-central-2 - EU (Zurich)
eu-central-1 - EU (Frankfurt)
eu-south-1 - EU (Milan)
eu-central-1 - EU (Frankfurt)
me-central-1 - Middle East (United Arab Emirates)
eu-west-2 - EU (London)
il-central-1 - Israel (Tel Aviv)
eu-west-2 - EU (London)
Deploy a Bundle
For any site that uses PWA Kit and Managed Runtime, you can only designate one bundle at a time as deployed for each environment.
Go to a project’s overview page.
Click the name of the environment you want to deploy to. For example: production.
Under the heading Bundles, click the Deploy button next to the bundle you want to deploy.
Click Confirm Deploy.
Wait until the deployment is complete.
When the deployment has successfully completed, the bundle appears underneath the heading Deployed Bundle. (For your first deployment to a new environment, the process can take up to an hour to complete.)
Delete a Bundle
For any site that uses PWA Kit and Managed Runtime, you can delete only non-deployed bundles form a project.
In the project’s overview page, click an environment.
Select one or more bundles that aren’t currently deployed.
Click Delete.
When asked to confirm, click Delete.
Wait until the deletion is completed.
Deletions are handled asynchronously and can take time to process.
Edit Environment Settings
The Environment Settings page is where you can do many administration tasks in one place, including:
Rename an environment or environment ID.
Change the deployment region.
Enable or disable server-side cookies. New projects have Server-Side Cookie Access enabled by default. Existing projects continue to have server-side cookies turned off by default. See Personalize with Cookies.
Allow traffic with specific IP addresses or a trusted access control header to access an environment. See Access Control Headers.
Configure proxies for an environment. See Proxying Requests for more information.
Control whether proxied requests forward the shopper’s original user agent or replace it with the Amazon CloudFront infrastructure user agent. See Proxying Requests.
Mark an environment as production.
Enable or disable Log Center logs and metrics under Observability settings. See Log Center Logs and Metrics.
Add, edit, or remove site IDs associated with an environment.
Add or edit an environment’s connection to a B2C Commerce instance.
Delete an environment.
To access the Environment Settings page:
Go to a project’s Overview page
Click the name of the environment whose settings you want to edit.
Click Environment Settings from the left navigation.
To make edits, click the Edit button next to either the General settings or the Advanced settings. After making your edits, click Update to save your changes or click Cancel to discard your changes.
Server-Side Rendering Architecture
Managed Runtime supports two processor architectures for Server-Side Rendering (SSR): ARM and x86. The architecture determines the underlying compute infrastructure used to render your storefront.
ARM Architecture (Default for New Projects)
ARM architecture is the default for all new projects created in Managed Runtime. ARM processors offer several advantages.
Enhanced Performance: ARM architecture provides efficient processing capabilities optimized for modern web workloads.
Modern Infrastructure: Built on the latest cloud computing technologies.
Who Can Use It: All new Managed Runtime projects automatically use ARM architecture.
x86 Architecture (Scheduled for Retirement)
The x86 architecture is retiring on January 31, 2027. After that date, environments running on x86 can’t be deployed. Environments aren’t deleted and continue to respond to requests. Switch your environments to ARM before this date to avoid deployment disruptions.
Warning
The x86 architecture is available for existing customers until its retirement on January 31, 2027.
Who: Existing customers with projects created before ARM architecture was introduced can continue using x86 until January 31, 2027.
Choosing an Architecture
New Projects: ARM architecture is automatically selected and is the recommended choice for all new projects.
Existing projects: x86 architecture is retiring on January 31, 2027. Switch your environments to ARM before this date to avoid deployment disruptions. Admins can switch existing environments to ARM at any time in Runtime Admin under environment settings. Most projects require no code changes. If your project uses architecture-specific native modules, test in a non-production environment before switching production.
Project-Level Default Architecture
You can set a default architecture at the project level that automatically applies to all new environments created within that project. This setting streamlines environment creation by eliminating the need to select an architecture for each new environment.
How to Set Project-Level Default:
Go to a project’s Overview page.
Click Project Settings from the left navigation.
Under Environment Defaults and Server Architecture, select either ARM or x86.
Click Update.
All new environments created in the project automatically use the selected default architecture. Existing environments aren’t affected by changes to the project-level default.
Clear an Environment's CDN Cache
You can clear some or all of an environment’s cached content in the content delivery network (CDN). Clearing the CDN cache helps to ensure that shoppers see the most recent and accurate version of content on your site.
It’s not possible to clear the CDN cache in Runtime Admin. However, when you redeploy a bundle, that clears all cached content for the associated environment.
Invalidation of the CDN cache temporarily results in slower performance for the first shoppers accessing the site after the invalidation.
Log Center logs and Log Center metrics are independently configurable for any environment, as long as the environment is associated with a B2C Commerce instance. Unlike production monitoring, enabling Log Center logs or metrics doesn’t require marking the environment as production.
Usage
Enable Log Center logs and Log Center metrics under Observability in Environment Settings. You can enable either setting independently.
An environment must be associated with a B2C Commerce instance before you can enable Log Center logs or metrics. See Edit Environment Settings.
Access control headers allow you to restrict access to an environment so that only trusted traffic coming from your content delivery network (CDN) or development team is allowed. Restricting access is important to ensure that bots don’t go around your CDN perimeter security settings and to ensure that search crawlers don’t index content from the wrong domain or environment.
If Allowed IP addresses are also set, requests with either a valid IP address or an access control header are allowed through.
Incoming requests are allowed only if an x-sfdc-access-control request header is present with a valid value.
Constraints
A header value is made up of your chosen set of characters. Each header value:
Must be at least 9 characters long
Can contain up to 128 characters
Can be a combination of alphanumeric characters and - and _ characters
Access control headers are not available to code running in a Managed Runtime environment.
Rotate Access Control Headers
You’re responsible for ensuring that the access control header value is securely stored and shared only with trusted individuals. We strongly recommend rotating the access control header on a regular basis.
Wait for the Environment redeploy to complete successfully. Verify requests to the environment with the new header value succeed with a command such as:
A redirect allows you to forward a request from the requested URL to a different URL. Redirects can help avoid disruptions to the user experience caused by changes to your storefront. For example, consider a seasonal campaign page for spring. When the spring campaign ends and is replaced with a summer campaign, you can redirect from the spring URL to the summer URL.
Redirects is a powerful feature that can have significant security consequences on your storefront, including redirecting to malicious URLs or assets. Please be careful when assigning roles to your users that give them Redirect access.
Create a Redirect
Before creating a redirect in a production environment, we recommend that you create it in a staging environment first.
Click the name of the environment where you want to create the redirect.
Click URL Redirects from the left navigation.
Click Create Redirect.
In the Redirect From field, enter a relative URL path. For example, to redirect visitors from the URL www.example.com/winter, enter /winter.
In the Redirect To field, enter a relative URL path.
If needed, enable forwarding of query parameters and the wildcard path. (More information on forwarding settings in a moment.)
From the Redirect Type dropdown menu, select a redirect type based on the HTTP status code. (More information on status codes in a moment.)
Click Create Redirect.
Let’s look at the options for creating a redirect in more detail.
Paths
The value that you enter in the Redirect From field must always be a relative path. The Redirect To field can be either a relative path or a full URL. For example, imagine that we want to redirect visitors from www.example.com/spring to www.example.com/summer. The Redirect From field must be /spring. The Redirect To field can be either /summer or www.example.com/summer.
Wildcards
You can add an asterisk character (*) to the end of the Redirect From URL to indicate a wildcard. A wildcard matches any (0 or more) characters in the URL. For example, a redirect from /a/* would match /a/, /a/b, and /a/b/c.
A wildcard character can only be used at the end of the Redirect From URL.
Standard redirects are processed first by Managed Runtime, followed by redirects with wildcards.
HTTP Status Codes
Most redirects use the Permanent 301 status code, but you can also select Temporary 302. If you’re unsure which HTTP status code to use, consult this status code explainer from MOZ.com.
Forwarding Query Parameters
Some requests contain query string parameters that you also want to include in the redirected request. For example, the relative path /spring-landing-page can be appended with a query string for analytics tracking, such as /spring-landing-page?gclid=123.
To enable query parameter forwarding, go to the Forward section of the form and select Query Parameters. Otherwise, query string parameters from the source URL aren’t included in the redirect URL.
What happens when both the Redirect From and Redirect To URLs both have query strings and forwarding is enabled? In this case, the redirect URL includes a combination of the two query strings. The query parameters from the Redirect To URL are appended to the query string in the request. For example, imagine your application receives a request for the relative path /spring?year=2019. If you’ve chosen to redirect /spring to /summer?year=2020, the redirect URL is /summer?year=2019&year=2020 when forwarding is enabled.
Forwarding Wildcard Path
You can automatically include any path that comes after the wildcard portion of the Redirect From URL in the Redirect To URL. For example: if /a/* matches /a/b/c in the Redirect From URL, and the Redirect To URL is /z/, the redirect URL is /z/b/c.
To enable wildcard path forwarding, go to the Forward section of the form and select Wildcard Path.
Clone Redirects
We recommend that you always create redirects in a staging environment and clone them into production after testing them.
Tip
You can copy all the redirects from one environment to another using the clone redirects feature.
Verify that you’re viewing the settings for the correct environment.
Edit the redirect and verify that the correct values are entered in the Redirect From and Redirect To fields.
Technical Limitations with Redirects
Redirects have the following technical limitations:
Each environment can have a maximum of 10,000 redirects.
Each environment has its own set of redirects. It is your responsibility to keep them in sync using cloning.
The redirects feature supports simple redirects from one path to another. For complex redirects with conditionals use Express.js’ redirects support in ssr.js.
Redirects created with the Runtime Admin tool or the Managed Runtime API are not run on local development environments.
Redirects are not triggered by page transitions in the PWA Kit application; they can only be triggered by an HTTP request.
To load a redirect in the context of a storefront, use the managed endpoint /mobify/redirect/$path.
Users
Here’s how to manage your users.
Add a User
To add a user to a project:
Go to a project’s Overview page.
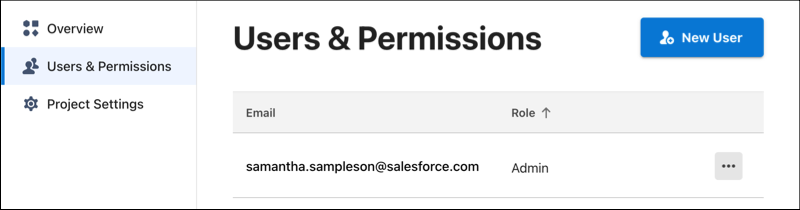
Click Users & Permissions from the left navigation.
Click New User.
Enter the user’s email address. (Make sure that the user is part of your organization and has either one of the following roles in Account Manager: Managed Runtime User or Managed Runtime Admin.)
Select a role.
Click Add User.
Change a User’s Role
To change a user’s role:
Go to a project’s Overview page.
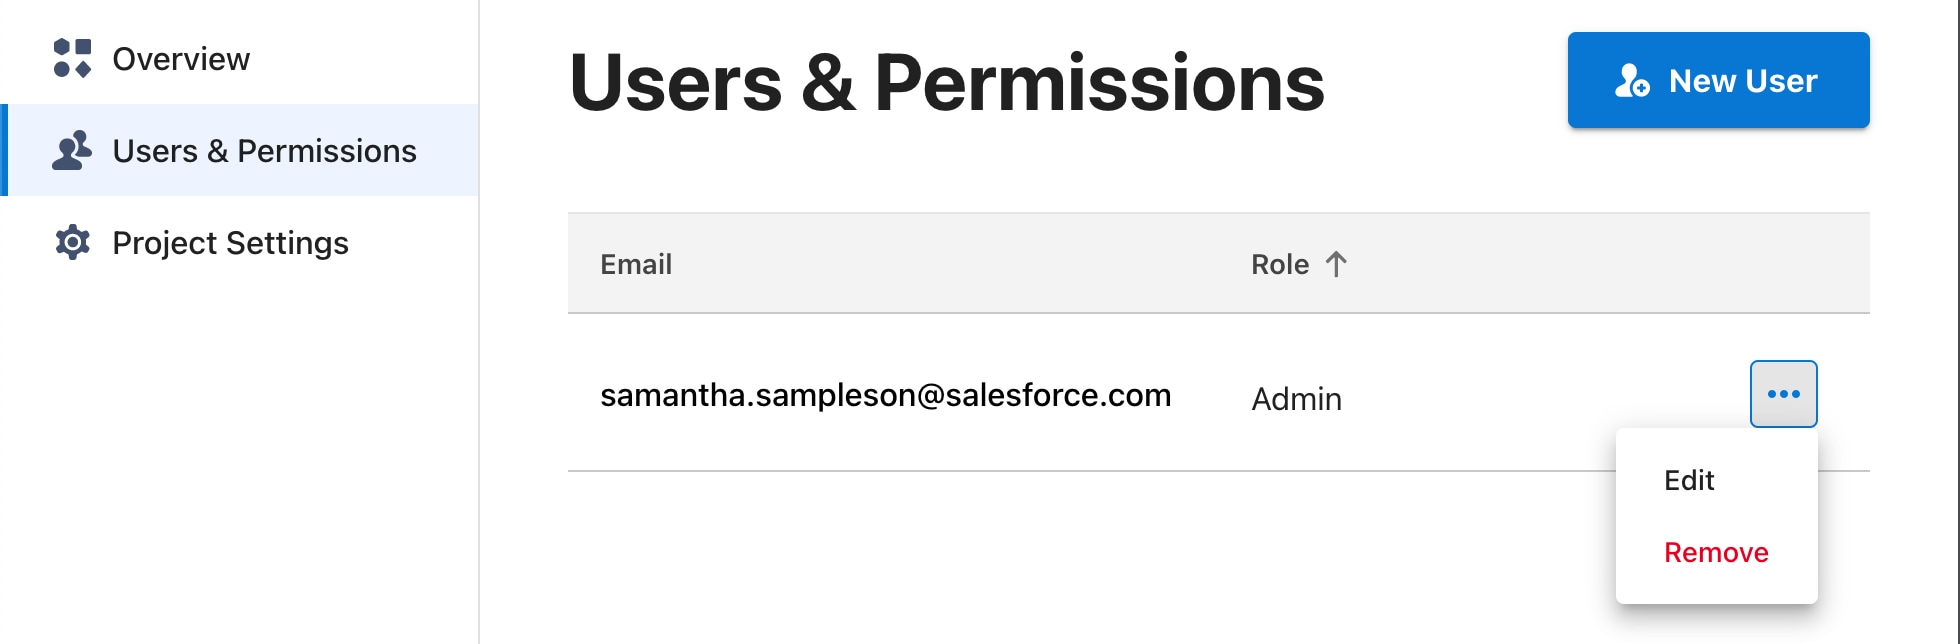
Click Users & Permissions from the left navigation.


 j
j