


 j
jFile Library Example
Knowledge Library Example
Next Steps
Export Agentforce Session Tracing Data
This guide shows you how to work with Connect REST API resources to manage Agentforce data libraries (ADL).
There are a few tools and items that we need for this quick start. The instructions focus on macOS and Linux but they should work with minimal changes on a different OS.
Salesforce CLI is a command-line interface that simplifies development and build automation when working with your Salesforce org. We use it to authenticate and get information about an org.
Install the CLI by using the Salesforce CLI Setup Guide.
We use jq for parsing JSON. To see if jq is already installed on your computer, run:
jq --version
If jq isn’t installed, run:
brew install jq
You need a PDF on your machine. The content doesn’t matter. We use the PDF as a file in your first data library.
Set up an org for the quick start. For org requirements, see Setting Up Data Libraries in Salesforce Help.
To securely use Connect API endpoints for ADL, you must create an External Client App (ECA).
Create an external client app with OAuth and usage of a JWT access token enabled. Use these instructions to get set up: Create a Local External Client App
When creating the app, include these settings.
Use these OAuth Scopes:
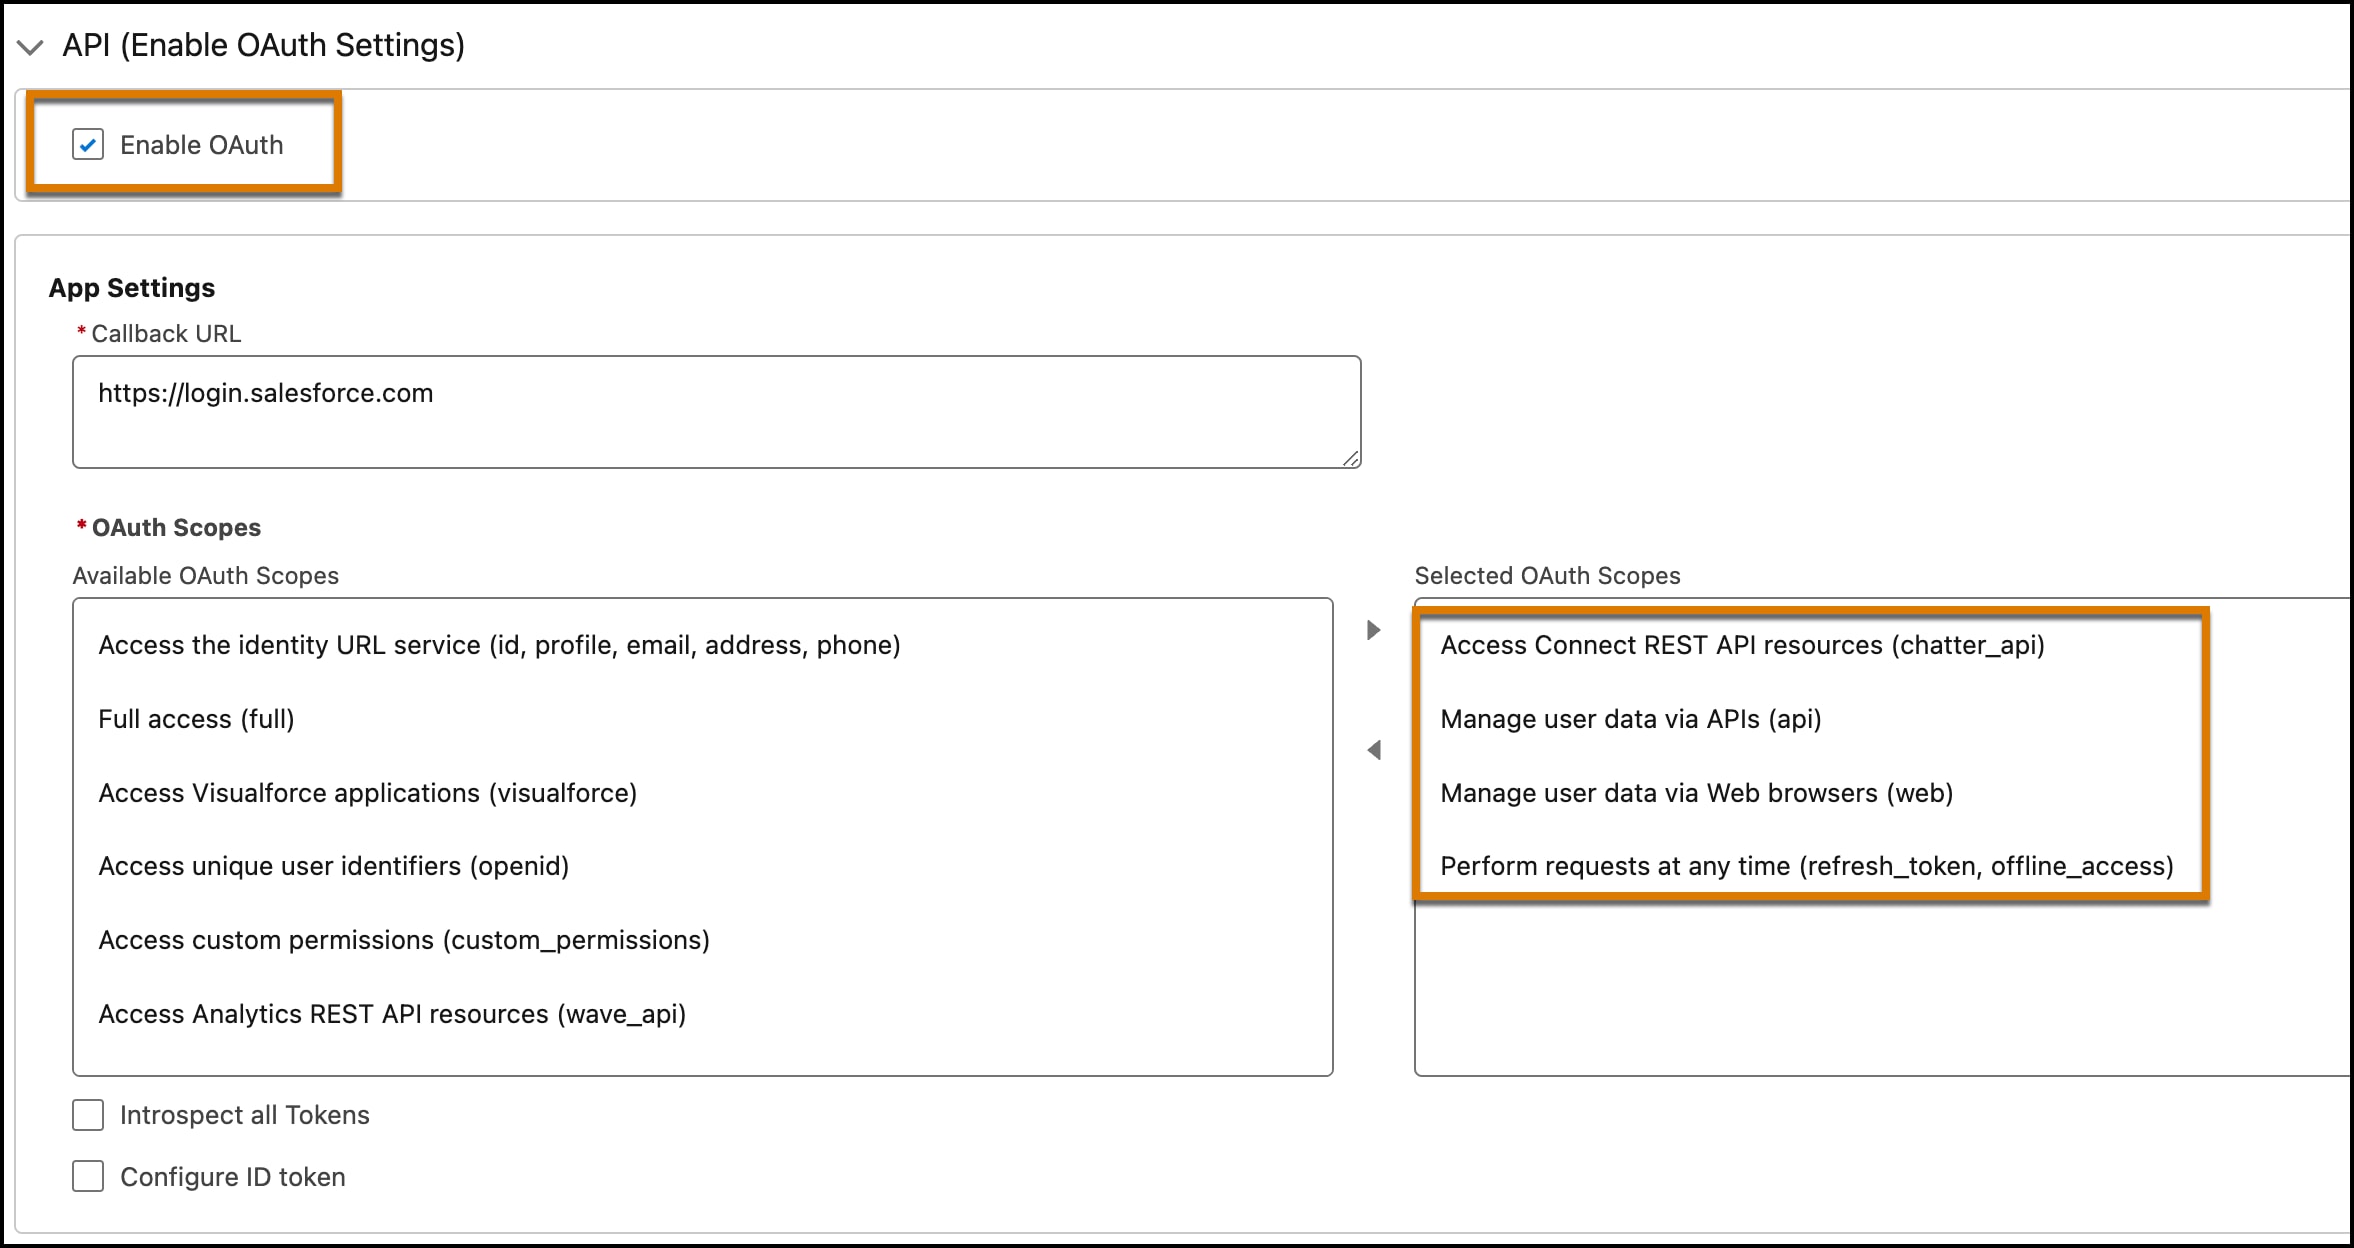
Select these additional OAuth settings:
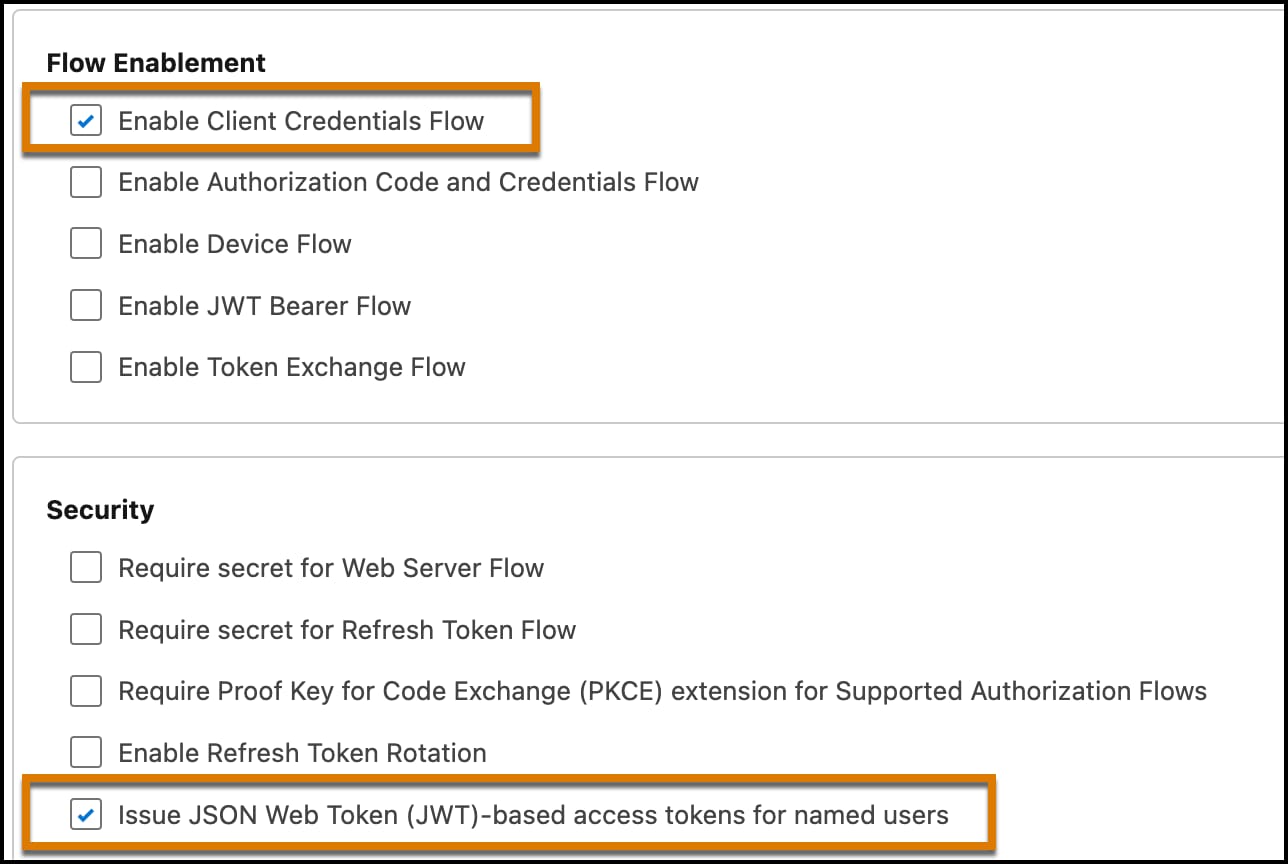
After creating the app, make sure that the API caller has the correct client credentials and that the client can issue JWT-based access tokens.
To create a token, you need the consumer key and the consumer secret from your ECA.
My Domain, and then select My Domain.All calls to Connect API require an access token. Create a token by using the consumer key, the consumer secret, and your domain name. For more information, see the Connect REST API Developer Guide.
In a Terminal, set these environment variables after you replace {CONSUMER_KEY}, {CONSUMER_SECRET}, and {MY_DOMAIN_URL} with values from your org.
MY_DOMAIN_URL: Get the domain from Setup by searching for My Domain. Copy the value shown in the Current My Domain URL field.CONSUMER_KEY, CONSUMER_SECRET: Get the consumer key and secret by following the instructions in Get Credentials.1export SF_CLIENT_ID={CONSUMER_KEY}
2export SF_CLIENT_SECRET={CONSUMER_SECRET}
3export SF_INSTANCE_URL=https://{MY_DOMAIN_URL}.my.salesforce.com.rproxy.goskope.comRun this command block to get an access token.
1# Get token via client_credentials flow
2RESPONSE=$(curl -s -X POST \
3  "$SF_INSTANCE_URL/services/oauth2/token" \
4  -d "grant_type=client_credentials" \
5  -d "client_id=$SF_CLIENT_ID" \
6  -d "client_secret=$SF_CLIENT_SECRET")
7
8ACCESS_TOKEN=$(echo $RESPONSE | jq -r '.access_token')
9ORG_URL=$(echo $RESPONSE | jq -r '.instance_url')
10
11# Verify ADL API
12curl -s "$INSTANCE_URL/services/data/v66.0/einstein/data-libraries" \
13  -H "Authorization: Bearer $ACCESS_TOKEN" | jq '.'
If you get a JSON response (even an empty array), OAuth is working.
Copy and paste this block into your terminal. It sets up a unique library name for your session.
Update FILE_NAME to point to your test PDF.
1# Generate a unique library name
2ADL_PREFIX="your_prefix"
3ADL_SUFFIX=$(date +%m%d)_$(LC_ALL=C tr -dc 'a-z0-9' < /dev/urandom | head -c3)
4ADL_DevName="${ADL_PREFIX}_${ADL_SUFFIX}"
5ADL_Name="${ADL_PREFIX} ${ADL_SUFFIX}"
6
7# Point to your test file (change this path)
8FILE_NAME="/Users/yourname/Downloads/file1.pdf"
We’re using a specific library naming convention for this quick start. You can choose any naming scheme for your libraries.
j