Set Up Salesforce Voice with Partner Telephony in Your Org
When Salesforce Voice with Partner Telephony licenses are added to an org, Salesforce admins in the org can open the Partner Telephony Setup page and follow the steps to set up their contact center. This guide describes how you can customize that experience.
This guide is for telephony providers who are creating a solution that integrates Salesforce Voice with their telephony system. If that’s not you, see the Salesforce Voice with Telephony Providers Implementation Guide or Salesforce Help. To update your solution to include Bring Your Own Channel for CCaaS Messaging capabilities along with Salesforce Voice, see the Bring Your Own Channel Developer Guide.
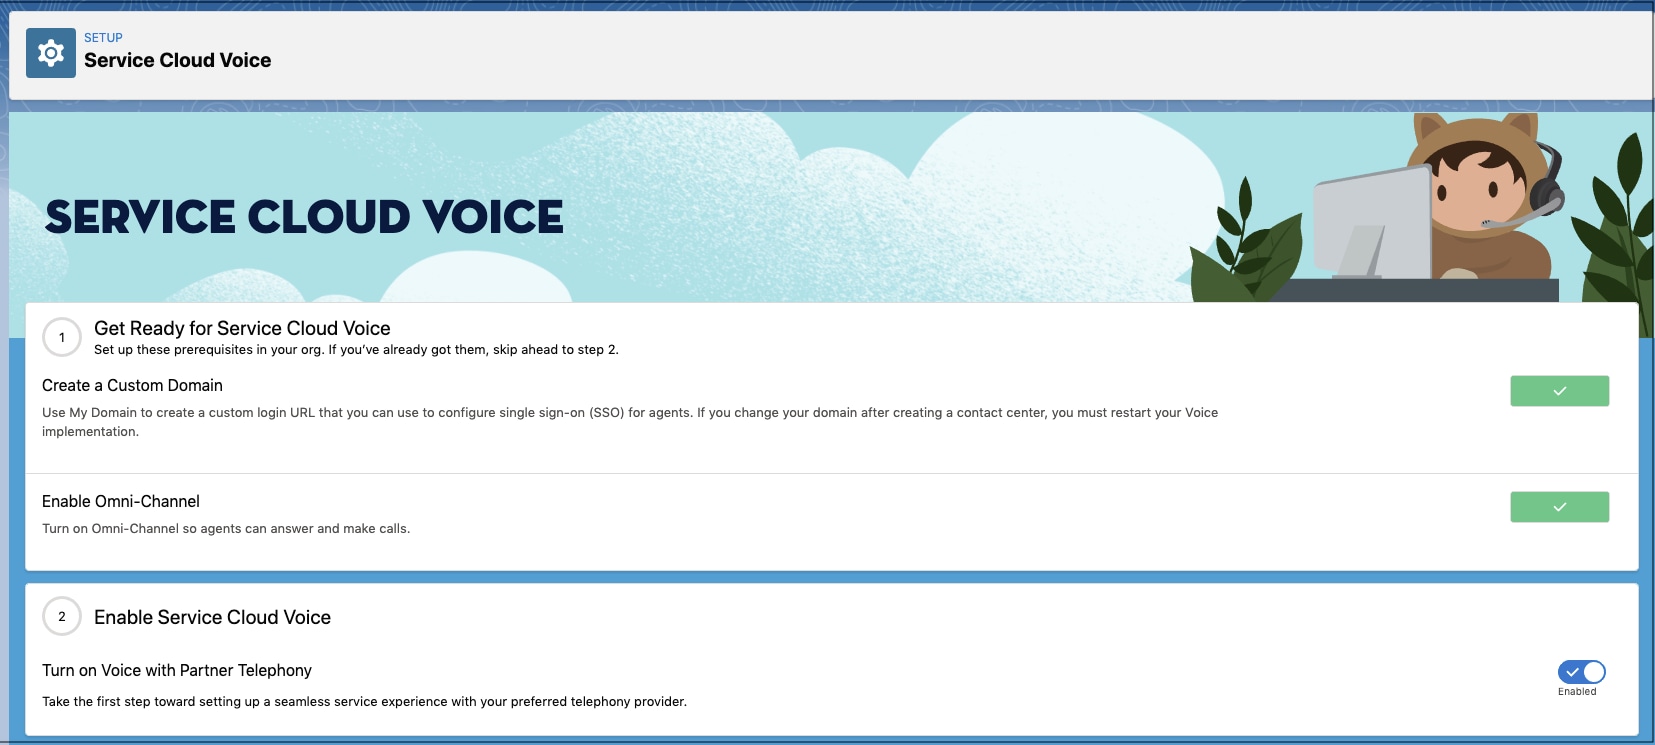
Customers can install the managed package from the App Exchange or from an external URL provided by the telephony partner. Telephony partners can skip installing the managed package from the App Exchange, because they install the managed package in their scratch orgs in Create an SFDX Project. Telephony partners can also follow these steps to set up contact centers in their scratch orgs.
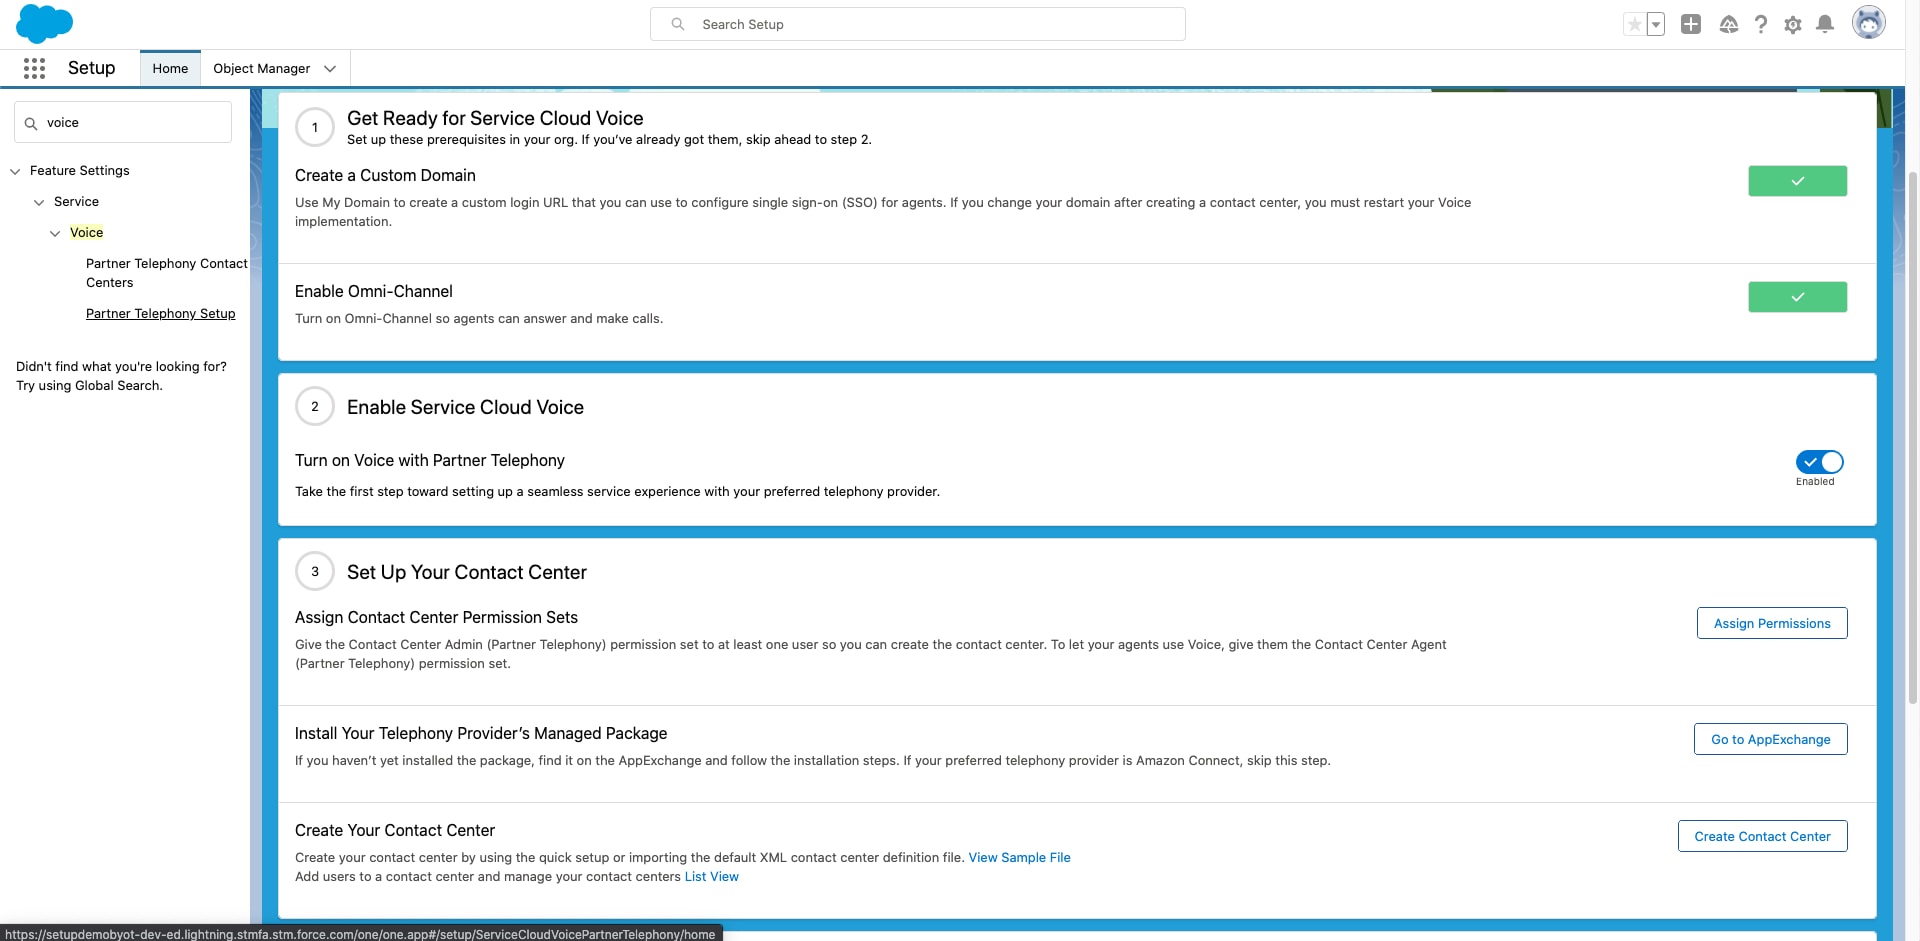
After the admin completes the initial step of enabling Omni-Channel, they can enable Voice in their org. The next steps require assigning the contact center permissions and creating the contact center.
-
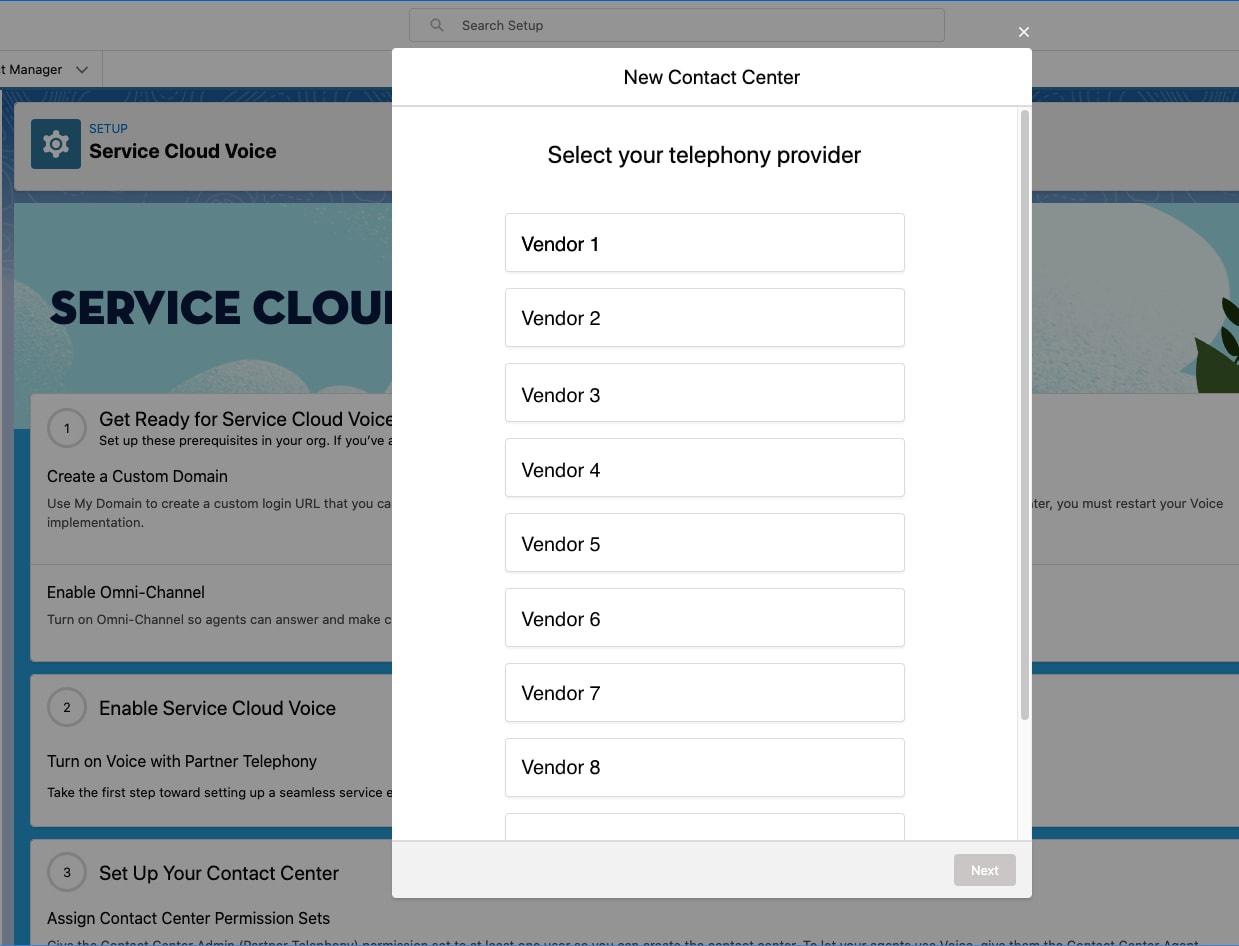
Both customers and telephony partners can follow the setup wizard to create a contact center.
-
After selecting the available vendor from the installed packages, there are two options. Either enter the contact center display name and internal name, or import an XML file to create a contact center.
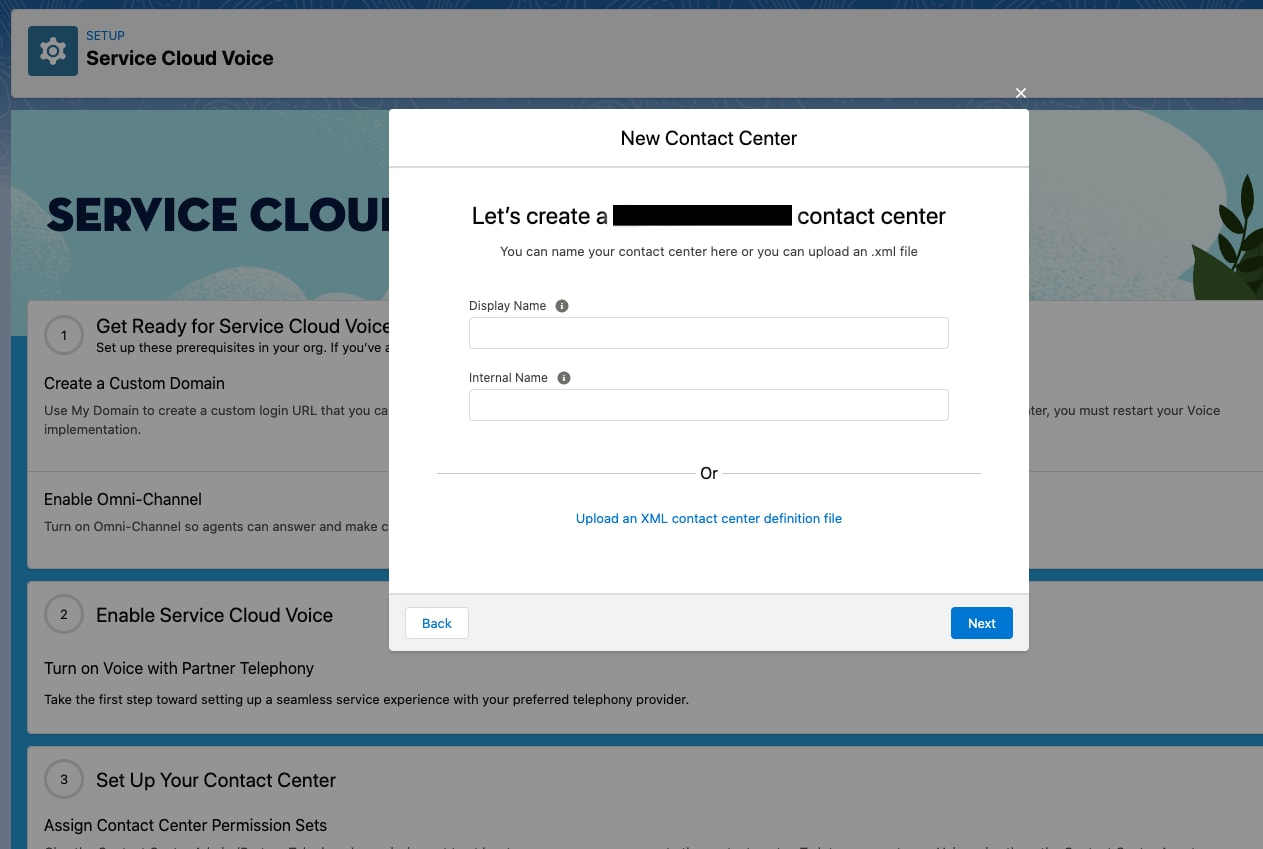
As you type text into the text field, the Upload an XML definition file link becomes disabled. Clear the text field to re-enable the link.
The next several steps describe the flow if you choose to enter the contact center name (rather than importing the XML).
-
The next setup step shows custom settings based on a custom object you can specify in the ConversationVendorInfo setup object. If you don’t have a custom object specified in ConversationVendorInfo, this step is skipped.
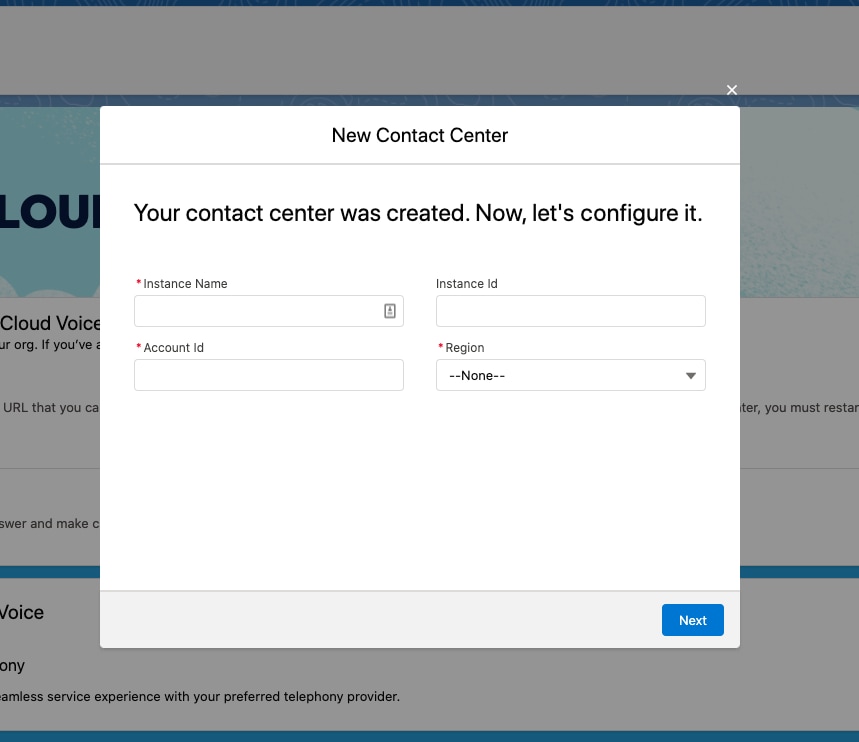
If the partner wants to allow customers to provide some non-standard settings, the partner can create a custom object and specify it in the ConversationVendorInfo object
customConfigfield. In this step, the setup wizard loads all the fields from the default layout to allow customers to provide values for settings. It creates a record of this custom object and stores the record ID in the contact center. When reps log in to the contact center, the record details are loaded as part of the contact center settings. -
If the partner wants to have an advanced feature that requires server-to-server communication with a named credential, it must be declared in the ConversationVendorInfo object
namedCredentialSupportedfield. If the partner doesn’t support this feature, this step is skipped.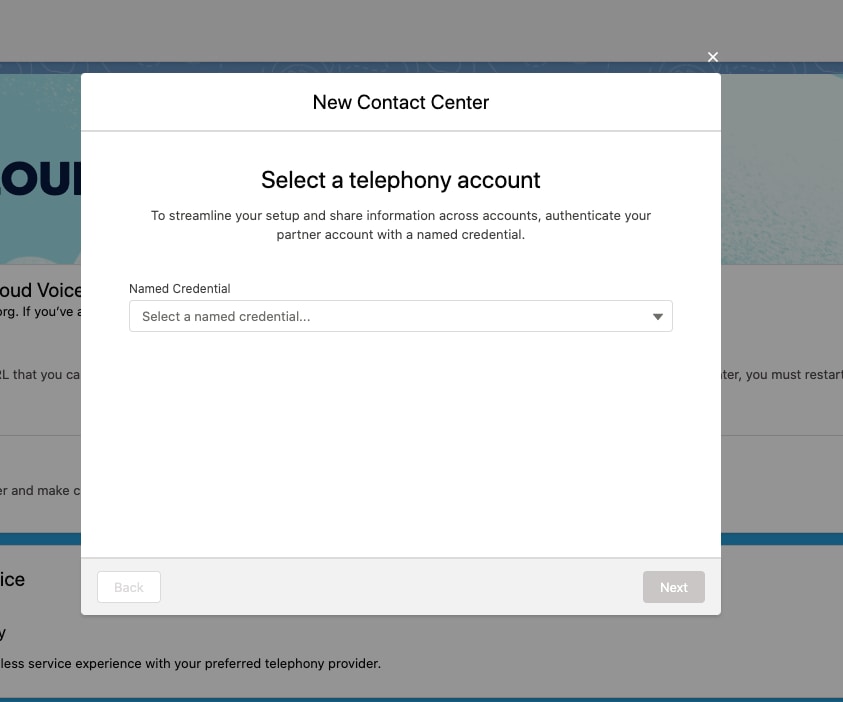
This functionality can be used for Einstein Conversation Insights, user syncing, or retrieving the external queue ID for queue mapping. These features require named credentials for the server-to-server authentication. In this step, the screen allows customers to choose which named credentials to use. It shows all the available named credentials in this org, either from local creation or an installed managed package. After clicking the Next button, it invokes the connect method from the Apex class that implements the
service_cloud_voice.PartnerConnectorinterface. If the response is successful, it stores the named credential ID in the contact center.-
If the partner also supports the rep SSO authentication, it must be declared in the ConversationVendorInfo object
agentSSOSupportedfield. Also provide an Apex class, which implements theservice_cloud_voice.PartnerSSOinterface. This step invokes the Apex class methods to get the required parameters and create the external client app to set up the SAML identity provider. -
If the partner supports named credentials, and there are multiple contact center instances in the vendor’s system, and you want to let the customer choose which one to connect to, this information must be declared in the ConversationVendorInfo object
partnerContactCenterListSupportedfield. This information also must be declared in the connect method from the Apex class that implements theservice_cloud_voice.PartnerConnectorinterface. This interface returns the list of the contact centers, with external IDs and labels. This step allows the customer to choose which external contact center to connect to. If this feature isn’t supported, this step is skipped.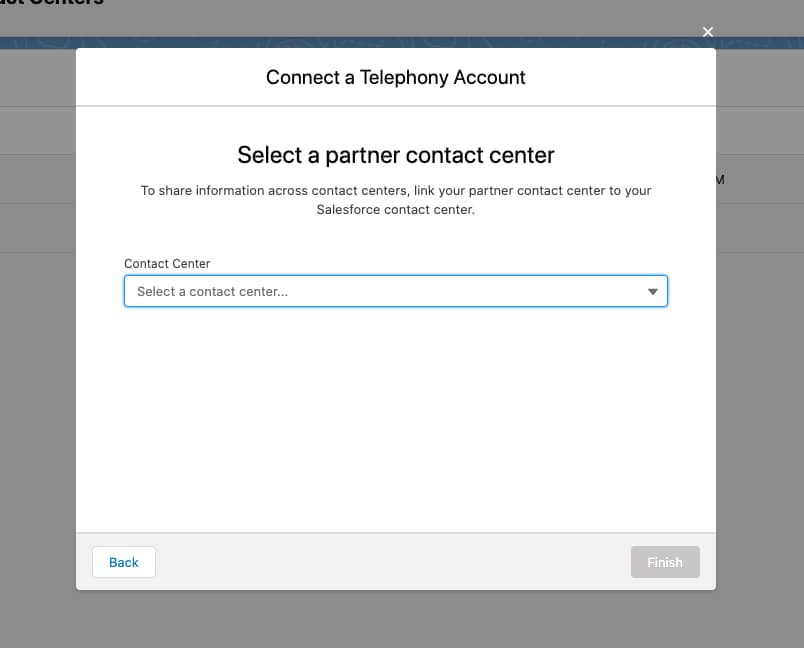
-
-
When importing XML, the content contains two mandatory sections and some optional, vendor-specific sections.
-
General Info Section:
-
Contains the Display Name and Internal Name. Use alphanumeric characters for the internal name of contact center. The internal name must be unique.
-
Set the
reqVendorInfoApiNameto <namespace prefix of managed package>__<developer name of the Conversation Vendor Info component>. You can check the namespace prefix and developer name from View Components inside the managed package.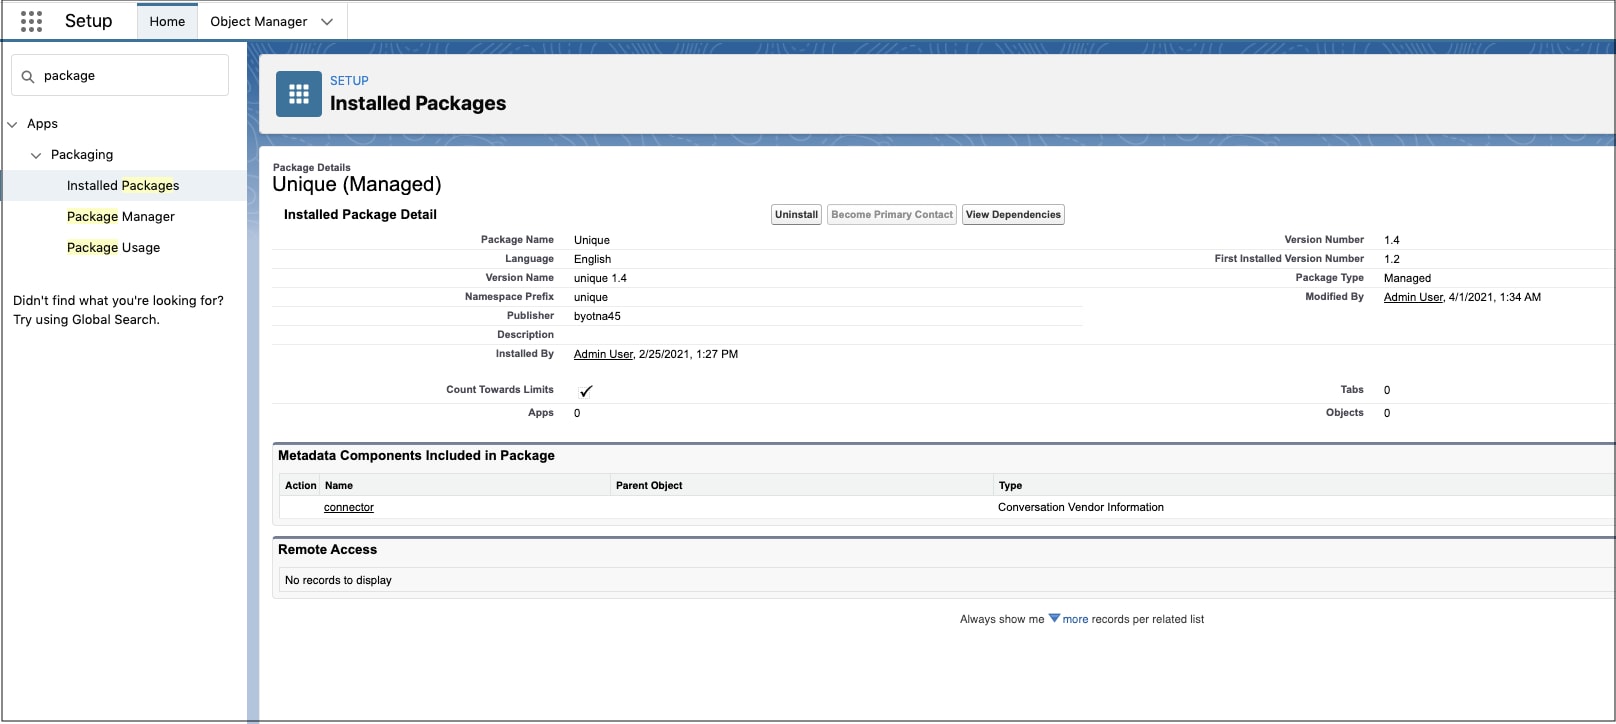
-
-
Salesforce Voice Settings Section:
- Set the
reqTelephonyIntegrationCertificateto the certificate as generated in Generate a Self-Signed Certificate with OpenSSL. Customers can use this info as provided by the telephony partner. - Update
reqLongDistPrefixto the desired area code prefix. The Omni-Channel softphone uses this area code for outbound calls.
- Set the
-
Partner Settings Sections:
- Telephony partners can include their specific configurations in the rest of the sections with a name other than reqGeneralInfo/reqHvcc. Customers must not change the configurations specified by the telephony partner.
-
There’s a maximum limit of 500 sections per XML file and 1,000 items per section.
-
-
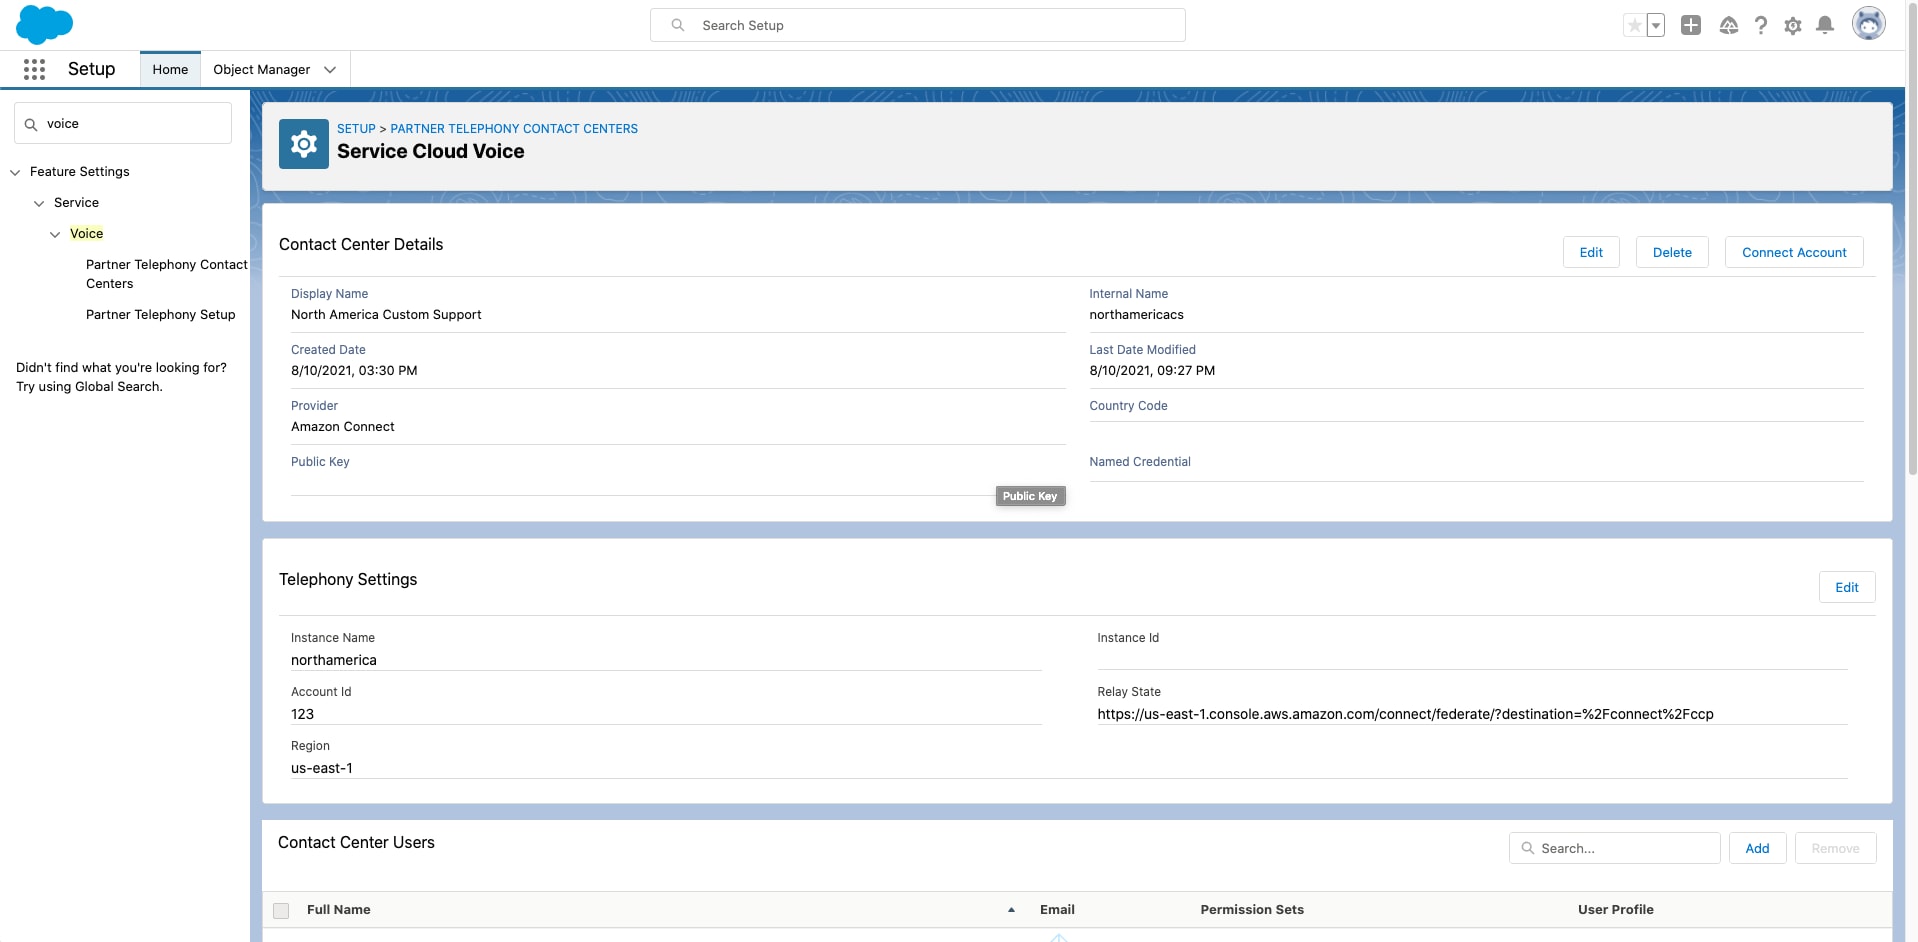
After the setup flow is completed, the contact center appears in the Partner Telephony Contact Centers node and the admin can add users to the contact center.

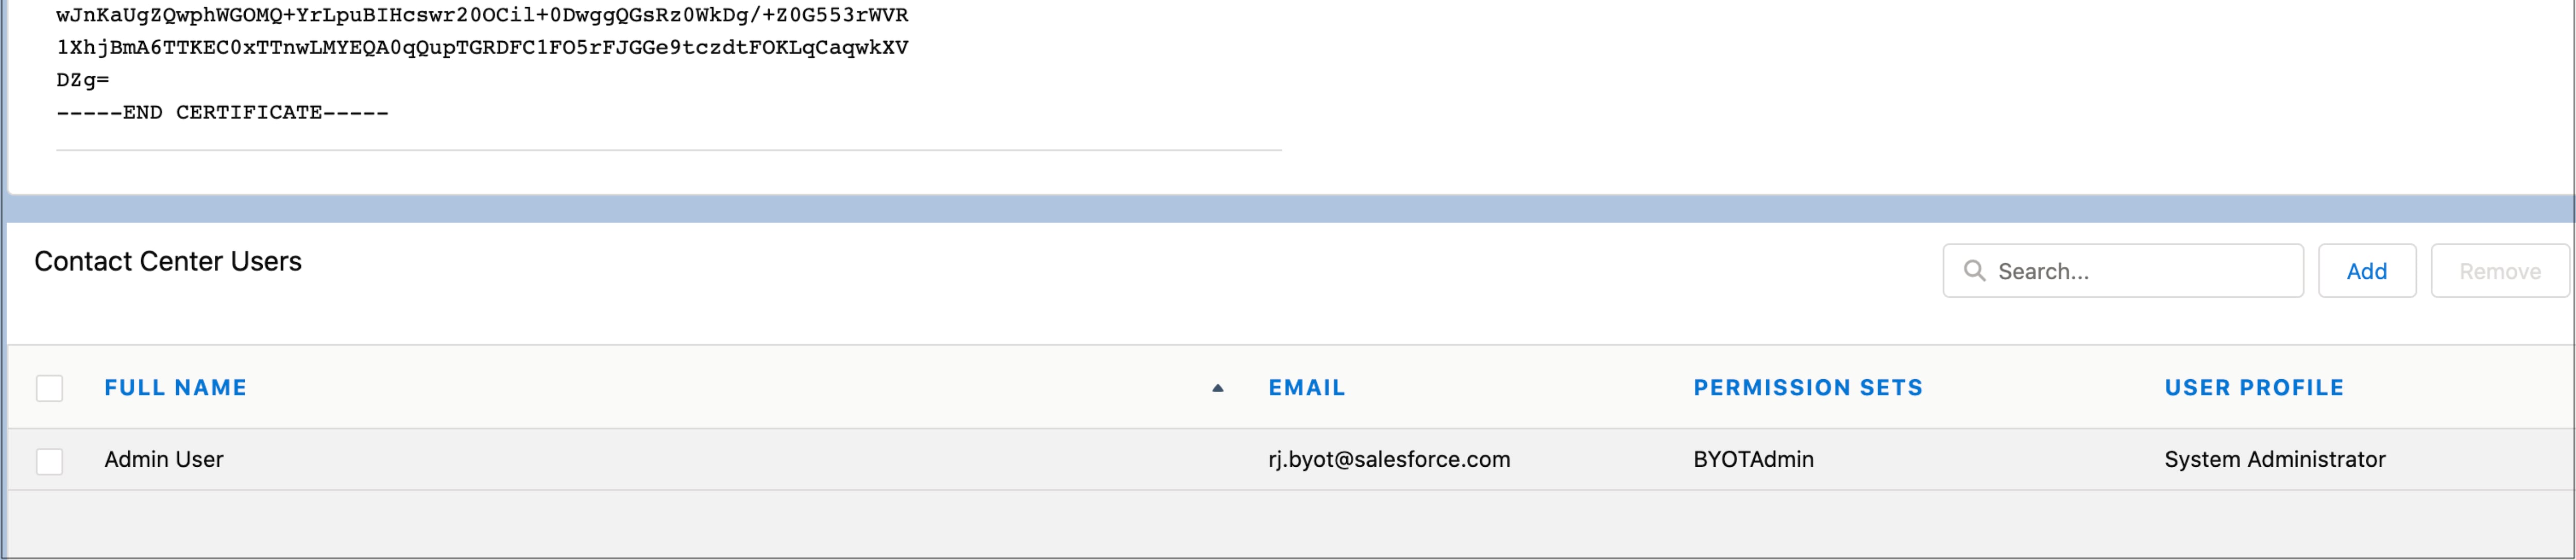
Other details about the setup process:
-
The admin clicks Create Contact Center to launch the wizard.
-
You can change the values on the contact center details page after the contact center is created.
-
If the setup flow is canceled before completion, the steps can still be completed on the contact center details page. The custom settings can be edited in the second section of the contact center details page. The connect button is on the top-right corner, which allows the admin to launch the wizard to select the named credential to connect to the telephony account. In the create contact center wizard, it doesn’t ask the public key, so the admin must update the contact center to provide the public key.
-
After this step is completed, the contact center appears in the Partner Telephony Contact Centers node and the admin can add users to the contact center.